
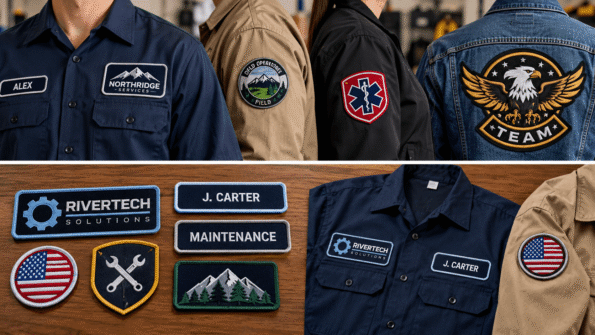
Custom uniform patches work best when they are planned as a consistent identification system, not as separate decorations added one garment at a time.
Before ordering, decide what each patch needs to communicate, where it will appear, which details stay the same across every uniform, which details change by person or role, and how the patches will be attached and maintained.
A practical uniform patch plan should cover:
- Organization or company identification
- Names and job roles
- Patch hierarchy
- Consistent placement
- Size and shape
- Material
- Backing
- Garment compatibility
- Laundering
- Employee or roster variations
- Reorder records
This guide focuses on those planning decisions. For a broader overview of patch materials and apparel applications, see our Clothing Patch Guide.
Important: Uniform requirements vary by employer, organization, agency, school, league, and jurisdiction. This guide covers design and production planning only. Always confirm any required uniform standards with the organization responsible for the uniform.
1. Decide What Each Uniform Patch Needs to Identify
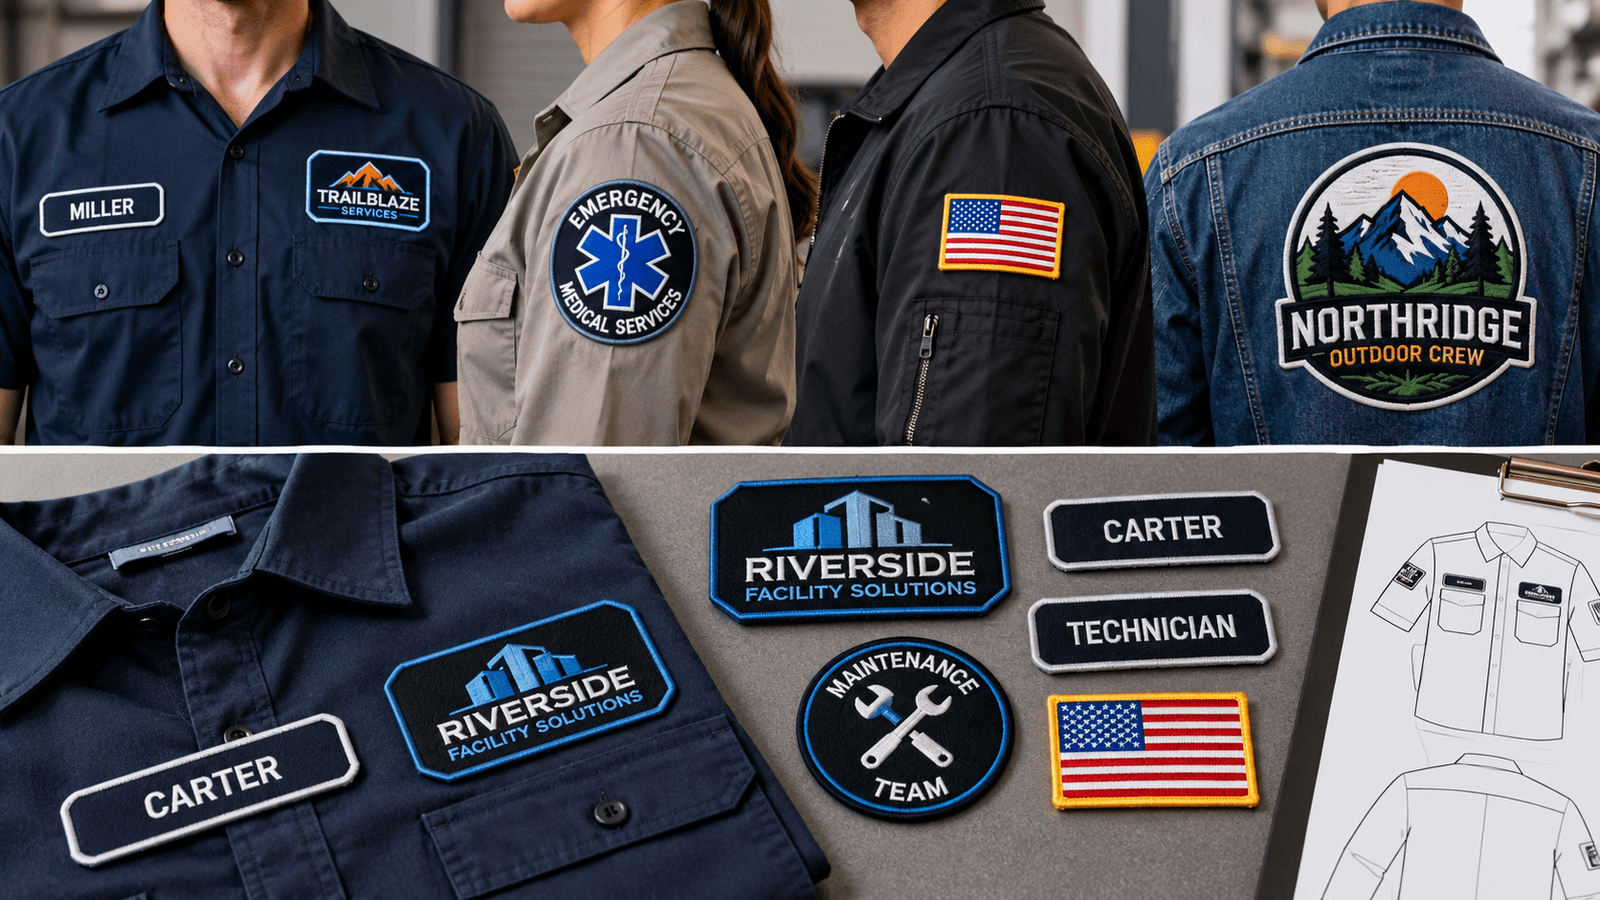
Start with purpose before choosing colors, borders, or materials.
A uniform may use patches to identify:
- Organization
- Business
- Department
- Team
- Location
- Employee
- Job title
- Role
- Unit
- Event
- Membership group
Do not place every piece of information into one patch automatically.
A cleaner system often separates information by function.
For example:
Organization patch: Company or team logo
Name patch: Employee name
Role patch: Supervisor, technician, coach, staff, or another approved role
Department patch: Operations, maintenance, service, or another internal group
This makes each patch easier to read and easier to replace if one piece of information changes.
2. Create a Clear Visual Hierarchy
Not every patch should compete for attention equally.
Ask which information someone should recognize first.
For many uniforms, the hierarchy might be:
- Organization identity
- Person or role
- Department or secondary identifier
The primary logo patch can therefore be more visually prominent than a secondary identifier.
Hierarchy can be created through:
- Patch size
- Placement
- Color contrast
- Shape
- Letter size
- Amount of detail
A uniform covered with several equally bold patches can feel visually crowded.
Instead, decide which patch carries the main identity and let supporting patches remain simpler.
3. Standardize Placement Before Production
Consistency matters when multiple people wear the same uniform.
Do not position patches individually by eye each time a garment is prepared.
Choose a standard location and record it.
Common uniform patch areas include:
- Left chest
- Right chest
- Above pocket
- Upper sleeve
- Shoulder area
- Center back
The best location depends on the garment.
Check for:
- Pockets
- Buttons
- Zippers
- Seams
- Reflective strips
- Reinforced panels
- Existing embroidery
Create a Placement Reference
A simple placement record might say:
Organization logo: Left chest
Name patch: Right chest above pocket
Department patch: Upper right sleeve
You can also record the approximate distance from a consistent garment reference point, such as a pocket edge or shoulder seam.
The purpose is not to create a universal uniform rule. It is to keep your own order consistent.
4. Check Every Garment Style
One placement specification may not work perfectly across every garment.
Your uniform program might include:
- Polo shirts
- Button-up work shirts
- Jackets
- Vests
- Hoodies
- Outerwear
A chest patch that fits comfortably above a pocket on a work shirt may conflict with a zipper on a jacket.
Before finalizing the entire order, test the placement on each garment type.
You may need separate placement instructions for:
Shirts
Jackets
Outerwear
while keeping the patch itself consistent.
Uniform Patch Planning Checklist
| Decision | What to Confirm |
|---|---|
| Identification | What information must the patch communicate? |
| Hierarchy | Which patch should be seen first? |
| Placement | Where will each patch sit on the garment? |
| Size | Does it fit the actual usable area? |
| Text | Can names, roles and departments be read clearly? |
| Material | Does the patch style suit the design and uniform? |
| Backing | Permanent or removable? |
| Garment | Are there pockets, seams, zippers or coatings? |
| Washing | How often will the uniform be laundered? |
| Variations | Which details change between employees? |
| Reorders | Are design specifications recorded for future orders? |
5. Choose a Patch Type That Matches the Uniform
Different materials create different visual results.
Embroidered Uniform Patches
Custom Embroidery Patches are a strong option when you want:
- Traditional stitched texture
- Bold logos
- Names
- Simple symbols
- Organization emblems
- Clear lettering
Embroidery works particularly well when the artwork uses defined shapes and readable text.
For classic workwear, club, business, or organization uniforms, it provides the familiar raised thread appearance many buyers expect from a uniform patch.
Woven Uniform Patches
Woven patches may make more sense when the design contains:
- Fine lines
- Smaller lettering
- Detailed logos
- Intricate symbols
The finer thread construction creates a smoother appearance than traditional embroidery.
If the design contains small text, do not automatically shrink an embroidered design until everything fits. Consider whether another patch type would preserve readability better.
PVC Uniform Patches
PVC creates a molded rather than stitched appearance.
It can suit uniforms or gear where you want:
- Bold shapes
- Defined color areas
- Modern styling
- Removable patch applications
Choose the material according to the design and environment rather than assuming every uniform should use embroidery.
6. Design Names and Roster Variations as a System
Personalized uniform orders become more complicated when every person needs different text.
For example:
- J. CARTER
- ALEXANDER
- M. RODRIGUEZ
These names have very different lengths.
If you design the name patch around the shortest name, longer names may need to be compressed later.
Instead, determine:
- Standard patch width
- Standard patch height
- Font style
- Maximum practical character count
- Capitalization style
- Text alignment
Then test the longest names expected in the group.
Keep the Patch Size Consistent
For most uniform programs, consistent outer dimensions create a cleaner appearance than making every name patch a different width.
The lettering can be adjusted within the approved area while the patch shape remains standardized.
7. Keep Titles and Roles Separate When They Change Often
Consider how frequently information changes.
A person’s name may remain the same while their:
- Department
- Rank
- Position
- Team assignment
- Role
changes.
If all information is combined into one patch, a small organizational change may require replacing the entire design.
Separating variable information can make future updates easier.
For example:
Patch 1: Employee name
Patch 2: Department or role
This is particularly useful when removable attachment is part of the uniform system.
8. Choose Permanent or Removable Attachment
Backing should reflect how often the patch needs to change.
Sew-On
Sew-on attachment is useful when:
- The patch should stay permanently attached.
- The uniform receives frequent use.
- The garment may be washed regularly.
- Heat application is unsuitable.
Iron-On
Iron-on can provide convenient application when:
- The garment safely supports heat.
- The patch backing is designed for heat application.
- Quick installation is useful.
Do not assume every uniform fabric can tolerate ironing.
Hook-and-Loop
Hook-and-loop is useful when:
- Names change.
- Roles change.
- Patches need to be removed.
- The garment already includes a compatible loop area.
For a deeper comparison of attachment systems, read our Patch Backing Types Guide.
9. Check Fabric Before Choosing the Backing
Uniforms can use many different fabrics.
Common examples include:
- Cotton
- Polyester
- Cotton-poly blends
- Nylon
- Stretch materials
- Performance fabrics
- Coated outerwear
The correct attachment method depends partly on the garment.
For example, some synthetic fabrics can be sensitive to excessive heat.
Likewise, sewing through coated or waterproof garments may affect the material.
Always review the garment care instructions and construction before selecting a permanent attachment method.
10. Plan Around Laundering
A patch may look perfect when first installed but still need to handle repeated garment care.
Before ordering, ask:
- How often will the uniform be washed?
- Will it be machine washed?
- Is the garment exposed to commercial laundering?
- Will the patch be removable before washing?
- Does the garment require special care?
Frequently laundered workwear usually benefits from a secure attachment method.
If patches are removable, determine whether employees should take them off before washing.
The patch material and backing should be considered together with the garment’s care requirements.
For more detailed maintenance guidance, see Caring for Custom Patches.
11. Keep Text Easy to Read
Uniform patches often carry functional information.
Readability should take priority over decorative typography.
Avoid:
- Very thin fonts
- Excessively small text
- Weak contrast
- Long wording forced into a small space
- Overly decorative scripts for identification
For a name or department patch, someone should not need to inspect the uniform closely just to understand the lettering.
If small text is unavoidable, woven construction may be worth considering.
12. Use Color Consistently
Create one approved color treatment for the uniform program.
That includes:
- Logo colors
- Background
- Lettering
- Border
- Secondary identifiers
Avoid changing colors between orders unless the change is intentional.
If separate garment colors are used—such as black jackets and light shirts—you may need alternate approved patch versions to maintain enough contrast.
Record those versions clearly.
For example:
Version A: Light logo on dark background
Version B: Dark logo on light background
This prevents future orders from becoming inconsistent.
13. Record the Approved Patch Specifications
One of the most useful things you can do after approving a uniform patch is create a simple specification record.
Save:
- Artwork file
- Approved patch image
- Width
- Height
- Shape
- Material
- Colors
- Border
- Backing
- Placement
- Name format
- Department format
- Approved variations
If possible, assign each design an internal name or reference.
For example:
POLO-LOGO-01
NAME-BLACK-01
OPS-SLEEVE-01
The exact naming system does not matter.
Consistency does.
14. Maintain a Roster for Personalized Patches
If you are ordering employee or player names, do not rely on handwritten notes scattered across emails.
Use a structured roster.
Useful fields include:
- First name
- Last name
- Exact patch wording
- Department
- Role
- Garment type
- Quantity
- Approved spelling
The exact patch wording field is especially important.
For example:
Employee name: Jonathan McAllister
Patch wording: J. McALLISTER
That removes ambiguity during production.
15. Proof Names Carefully
Spelling errors are easy to miss in large personalized orders.
Before approval, review:
- Names
- Initials
- Numbers
- Departments
- Locations
- Abbreviations
- Titles
Do not approve personalized artwork by looking only at the logo.
Check every variable line.
For large rosters, a second reviewer can help catch mistakes before production.
16. Plan for New Employees and Replacements
Uniform programs rarely end with the first order.
Later, you may need patches for:
- New employees
- Replacement garments
- Lost patches
- Promotions
- Department changes
- New locations
- New team members
Good reorder records prevent those additions from becoming a redesign project.
Instead of saying:
“Make something similar to our last order.”
you should be able to provide the exact existing specification.
17. Do Not Treat Placement as a Compliance Decision
Patch placement can sometimes be governed by an employer, organization, agency, school, league, or other authority.
Those requirements are outside the scope of general patch design guidance.
PatchesOrder can create the physical patch based on your artwork and specifications, but the buyer should confirm any required:
- Uniform policy
- Official insignia placement
- Department standard
- Employer rule
- League requirement
- Agency guideline
before approving production.
Do not use a generic online placement guide as a substitute for your organization’s official requirements.
Final Uniform Patch Checklist
Before sending your custom uniform patch order, confirm:
- Purpose of every patch is defined
- Primary and secondary identifiers are clear
- Placement is standardized
- Each garment style has been checked
- Patch dimensions fit the actual placement area
- Names and titles remain readable
- Longest roster names have been tested
- Patch material suits the artwork
- Backing suits the garment and use
- Laundering has been considered
- All names and numbers are proofread
- Approved colors are recorded
- Artwork and specifications are saved for reorders
- Any organization-specific uniform requirements have been confirmed separately
Build a Uniform Patch System That Is Easy to Maintain
The best custom uniform patches do more than display a logo.
They create a repeatable system for identifying people, teams, departments, or organizations across multiple garments.
Start with the information hierarchy. Standardize placement. Design variable name and role patches carefully. Choose a material and backing that fit the uniform. Then record the approved specifications so future replacements and new-roster orders remain consistent.
PatchesOrder offers Custom Clothing Patches for uniforms, workwear, shirts, jackets, teams, businesses, schools, and organizations.
Have your logo or uniform patch concept ready?
Request a Free Quote for Custom Uniform Patches.
Frequently Asked Questions About Custom Uniform Patches
What type of patch is best for uniforms?
It depends on the artwork and garment. Embroidered patches work well for classic stitched logos and lettering, woven patches suit finer details and smaller text, and PVC can provide a molded modern appearance.
Where should uniform patches be placed?
Common areas include the chest, above a pocket, upper sleeve, shoulder area, and back. The correct location depends on the garment and any requirements set by the organization using the uniform.
Should uniform patches be sewn on or ironed on?
Sew-on is useful for permanent attachment and frequently worn garments. Iron-on can be convenient when the patch and uniform fabric safely support heat application.
Are hook-and-loop patches good for uniforms?
They can be useful when names, roles, departments, or other identifiers need to be removed or changed. The garment needs a compatible loop surface.
How do I keep employee name patches consistent?
Use one approved patch size, font, capitalization style, color treatment, and alignment. Test the format using the longest names expected before approving the full roster.
What information should I save for uniform patch reorders?
Keep the approved artwork, size, shape, material, colors, border, backing, placement instructions, personalized wording format, and any approved design variations.
Can the same uniform patch be used on shirts and jackets?
Sometimes, but the garment construction and available placement area may differ. Check each clothing type before assuming the same size, backing, and position will work across the entire uniform program.
