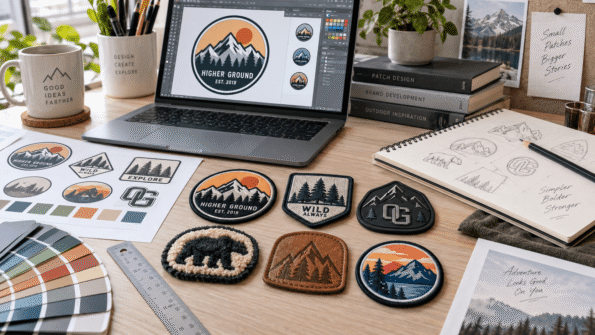
A great custom patch starts with good artwork.
You do not necessarily need a production-ready design before ordering a patch, but providing clear artwork makes it easier to preserve your logo, lettering, colors, proportions, and important design details.
The artwork that looks perfect on a computer screen may also need some adjustments before it can become an embroidered, woven, PVC, chenille, leather, or sublimated patch. Thread, PVC, leather, and printed fabric reproduce artwork differently from a digital screen.
This guide explains how to prepare artwork for custom patches, including file formats, image resolution, colors, fonts, borders, small details, patch size, and the differences between preparing artwork for different patch materials.
If you already have your artwork ready, explore Custom Patches or send your design to PatchesOrder for review.
What Artwork Do You Need for a Custom Patch?
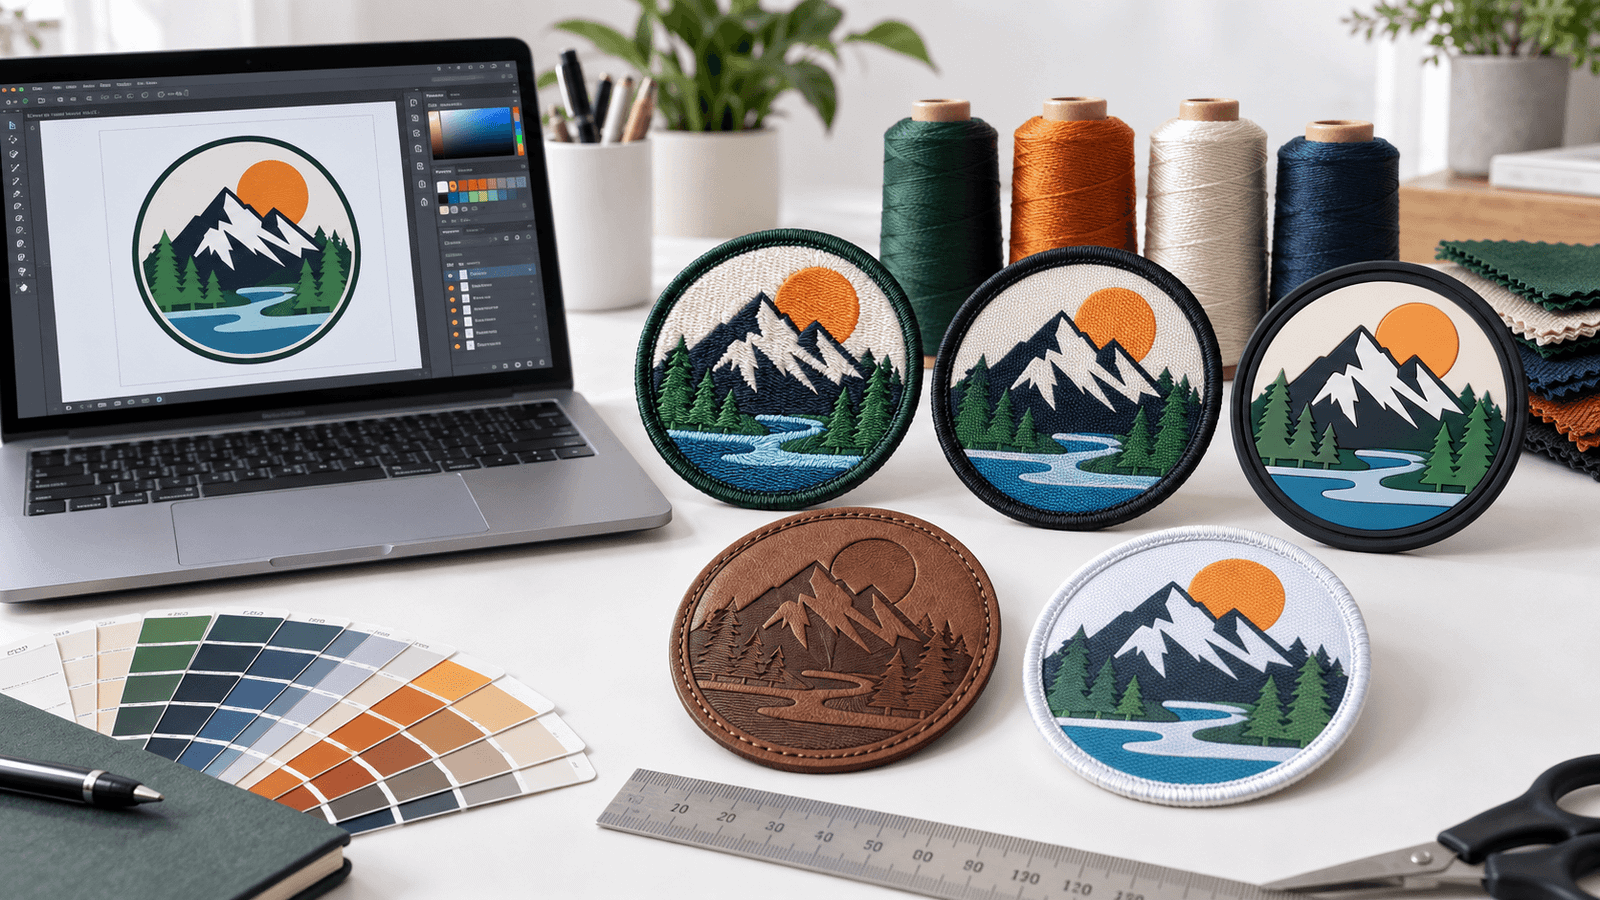
Custom patch artwork can start with many different source files.
You may have:
- A company logo
- Vector artwork
- PNG artwork
- JPG or JPEG image
- PDF file
- Illustration
- Team emblem
- Mascot
- Badge design
- Text or lettering
- Hand-drawn concept
- Rough sketch
- Existing patch reference
- Photograph
The cleaner the original artwork is, the easier it is to understand what the finished patch should look like.
However, you should not assume that you cannot order patches simply because you do not have professional vector artwork.
If you have a clear logo, image, or concept, it can be used as the starting point for preparing your custom patch design.
Quick Artwork Preparation Checklist
Before submitting your artwork, check these basics:
| Artwork Element | What to Check |
|---|---|
| File quality | Use the clearest original file available |
| Size | Decide approximately how large the finished patch should be |
| Text | Check spelling and make sure small text is readable |
| Colors | Identify important brand or design colors |
| Lines | Avoid unnecessary extremely thin details |
| Shape | Decide whether the patch follows a standard or custom shape |
| Border | Leave enough room around important artwork |
| Background | Make it clear which areas belong in the patch |
| Patch type | Consider embroidery, woven, PVC, chenille, leather, or sublimation |
| Placement | Know where the finished patch will be used |
| Proof | Review the digital proof carefully before production |
These details help translate digital artwork into a physical patch more accurately.
What Is the Best File Format for Custom Patch Artwork?
Vector files are generally the easiest files to work with for logos and graphic artwork because they can be resized without becoming pixelated.
Common vector formats include:
- AI
- EPS
- SVG
- Vector PDF
High-quality raster files can also be useful.
Common raster formats include:
- PNG
- JPG or JPEG
- TIFF
- PSD
You do not need to convert a low-quality image into a PDF simply to make it look more professional. Changing the file extension does not restore missing image detail.
Whenever possible, send the original artwork file rather than a screenshot or image downloaded from social media.
Vector vs. Raster Artwork for Patches
Understanding the difference between vector and raster artwork can help you choose the best file to submit.
Vector Artwork
Vector graphics are built from mathematically defined paths, shapes, lines, and curves.
This means the artwork can generally be enlarged or reduced without becoming pixelated.
Vector files are particularly useful for:
- Company logos
- Brand marks
- Typography
- Badges
- Emblems
- Geometric graphics
- Simple illustrations
If your designer created your logo in a vector design program, ask for the original AI, EPS, SVG, or vector PDF file.
Raster Artwork
Raster images are composed of pixels.
PNG and JPG files are common examples.
A good-quality raster image can still provide a useful source for custom patch artwork, particularly when it is clear, large, and not heavily compressed.
Problems occur when the source image is extremely small or blurry.
For example, enlarging a small logo copied from a website does not create additional detail. It simply makes the existing pixels larger.
What Resolution Should Patch Artwork Be?
For raster artwork, start with the highest-resolution version of your design available.
As a practical guideline, artwork around 300 DPI at the intended print or design size provides considerably more information than a small web image.
However, DPI alone does not determine whether artwork is usable.
A tiny 200-pixel image will not become detailed simply because its metadata says 300 DPI.
More important considerations include:
- Actual pixel dimensions
- Sharpness
- Original image quality
- Size of the finished patch
- Complexity of the design
- Manufacturing method
If you have vector artwork, resolution is generally less of a concern because the graphic can be scaled.
Avoid Screenshots When the Original File Is Available
Screenshots should usually be a last resort.
A screenshot can introduce:
- Pixelation
- Compression
- Unwanted backgrounds
- Cropped artwork
- Reduced color accuracy
- Blurry lettering
- Interface elements around the design
If you have the original logo file, send that instead.
If a screenshot or photograph is the only reference available, submit the clearest version possible so the design can be evaluated.
Prepare Artwork at the Intended Patch Size
One of the biggest mistakes in patch design is evaluating artwork only while it is enlarged on a computer screen.
A logo may look very clear when displayed 12 inches wide on a monitor but become difficult to reproduce when reduced to a 2.5-inch patch.
Always think about the physical finished size.
For example:
- Small hat patches need compact artwork.
- Chest patches typically have less design space than jacket-back patches.
- Large jacket patches can accommodate more elements.
- Very small patches require simpler lettering and graphics.
If the same design will be used on a cap, our Custom Hat Patches Guide explains how hat size and panel space affect patch design.
Simplify Very Small Details
Patches are physical products.
Thread, yarn, molded PVC, leather, and fabric cannot always reproduce microscopic details in exactly the same way as pixels on a screen.
Look closely at your artwork for:
- Extremely thin lines
- Tiny text
- Small gaps
- Closely packed shapes
- Detailed shadows
- Fine outlines
- Complicated textures
- Tiny symbols
Ask whether each element will still be recognizable at the final patch size.
Removing unnecessary detail can often make the finished patch stronger rather than less interesting.
Keep Text Readable
Small lettering is one of the most common challenges when converting artwork into a patch.
If your patch contains:
- Company names
- Employee names
- Unit names
- Team names
- Dates
- Numbers
- Slogans
- Locations
- Short messages
make sure the text has enough room around it.
Bold, clean lettering is generally easier to reproduce than extremely thin, compressed, or decorative typography.
For very detailed logos or smaller lettering, Custom Woven Patches may be worth considering because woven construction uses fine threads and is well suited to detailed artwork and small text.
Our Woven vs. Embroidered Patches guide provides a deeper comparison if you are deciding which construction better suits your logo.
Convert Important Fonts to Outlines When Possible
If you are submitting an editable vector file, fonts can sometimes change when the recipient does not have the same font installed.
One common design practice is to convert final typography into outlines or curves before sending production artwork.
This turns the letters into graphic shapes instead of relying on the original font file.
However, keep an editable master copy of your artwork before outlining the text so you can make future wording changes if needed.
If you are not working with professional design software, simply provide the clearest original artwork available rather than worrying about converting the fonts yourself.
Check Spelling Before Submitting Artwork
A typo can become part of the physical product if it is not caught during artwork review.
Carefully check:
- Brand names
- Personal names
- Department names
- Team names
- Numbers
- Dates
- Locations
- Abbreviations
- Slogans
- Website addresses
This becomes particularly important for Custom Army Unit Patches, employee identification, commemorative patches, team patches, and other designs where names and numbers have specific meaning.
Check the text again when you receive the digital proof.
Use Clear Color References
Computer monitors do not all display colors exactly the same way.
If a particular color is essential to your branding, provide as much information as possible.
This might include:
- Original brand artwork
- Brand style guide
- Color reference
- Pantone reference where applicable
- Existing product sample
- Clear notes identifying important colors
Avoid selecting colors solely from a low-quality screenshot if you have access to original brand files.
It is also useful to think about contrast.
Dark lettering on a dark background or pale artwork on a similar-colored background may be difficult to distinguish.
Strong contrast can improve the visibility of:
- Text
- Borders
- Logos
- Symbols
- Mascots
- Fine design elements
Decide Whether the Background Is Part of the Design
Transparent-background files are useful when your artwork should not have a rectangular background around it.
PNG files can support transparency, while standard JPG files do not.
Make it clear whether:
- The background should appear in the patch.
- The background should be removed.
- The patch itself should use that background color.
- The design should follow the outline of the artwork.
This is particularly important when submitting logos taken from websites, presentations, screenshots, or photographs.
Consider the Shape of the Patch
Your source artwork does not necessarily have to be square or circular.
Custom patches can follow a range of shapes depending on the design and patch type.
Common shapes include:
- Circle
- Square
- Rectangle
- Oval
- Shield
- Diamond
- Arch
- Custom silhouette
Think about how your logo and border work together.
If your design has a complicated outline, leave enough space between important elements and the outer edge.
Leave Space Around Important Artwork
Do not position text or important logo elements directly against the edge unless that is intentionally part of the design.
A little breathing room can help accommodate the patch border and prevent the design from feeling crowded.
This is especially relevant when the patch uses a prominent finished edge.
Consider the relationship between:
Artwork → spacing → border → patch edge
rather than treating the border as an afterthought.
Choose the Patch Type Before Finalizing Every Detail
The best artwork preparation method depends partly on how the patch will be manufactured.
PatchesOrder offers several custom patch styles, including embroidered, woven, PVC, chenille, leather, and sublimation patches.
Each material interprets artwork differently.
Preparing Artwork for Embroidered Patches
Custom Embroidery Patches use stitched thread to create a raised, textured appearance.
Embroidery tends to work particularly well with:
- Bold logos
- Clear lettering
- Strong outlines
- Simple shapes
- Emblems
- Traditional badge designs
Very fine lines, subtle gradients, and tiny details may need to be simplified when translated into stitches.
Think in terms of thread and shapes, not pixels.
If a small detail does not contribute much to the overall logo, removing it may create a cleaner finished embroidered patch.
Preparing Artwork for Woven Patches
Custom Woven Patches use finer threads and create a smoother, lower-profile surface.
They are particularly useful when artwork includes:
- Fine details
- Smaller lettering
- Intricate logos
- Thin lines
- Detailed symbols
This does not mean every microscopic detail should remain in the design, but woven construction generally provides more flexibility for detailed thread-based artwork than traditional embroidery.
For a direct comparison, read Woven vs. Embroidered Patches: Which Is Best for Your Logo?.
Preparing Artwork for PVC Patches
Custom PVC Patches use flexible molded material instead of stitched thread.
PVC artwork works especially well with:
- Bold shapes
- Defined color areas
- Layered designs
- Strong outlines
- 2D or raised effects
- Modern logos
- Tactical-style graphics
When preparing PVC artwork, clearly separated design elements can help communicate how different areas should appear.
If the design relies heavily on texture created by embroidery thread, remember that PVC will produce a different visual effect.
Read Why Choose PVC Patches? for more information about PVC customization and applications.
You can also compare the two constructions in our PVC vs. Embroidered Patches Guide.
Preparing Artwork for Chenille Patches
Custom Chenille Patches use thick, looped yarn to create the soft dimensional texture associated with varsity and letterman designs.
Chenille is especially effective for:
- Large letters
- Initials
- Numbers
- Mascots
- Team symbols
- School emblems
- Bold shapes
Artwork should generally be visually strong rather than packed with tiny details.
Large, readable shapes allow the texture of chenille itself to become part of the design.
Preparing Artwork for Leather Patches
Custom Leather Patches can create a very different appearance from thread-based patches.
They work well for:
- Brand logos
- Wordmarks
- Monograms
- Outdoor branding
- Denim
- Hat patches
- Fashion labels
Leather artwork often benefits from clean line work, recognizable shapes, and clear logo structure.
If your intended effect involves embossing, debossing, engraving-style detail, or printing, consider how the artwork will look as a leather surface rather than only as a full-color screen graphic.
Preparing Artwork for Sublimation Patches
Custom Sublimation Patches are particularly useful for artwork that relies on printed detail.
Sublimation can be suitable for:
- Complex illustrations
- Multiple colors
- Gradients
- Detailed graphics
- Photographic-style imagery
If maintaining detailed color transitions is important to the artwork, sublimation may be more suitable than simplifying the design extensively for traditional embroidery.
The key is to start with the highest-quality original image possible.
Match the Artwork to the Application
Your patch should not be designed separately from the product it will eventually be attached to.
Consider whether the patch will go on:
- Jacket
- Shirt
- Polo
- Uniform
- Hat
- Hoodie
- Backpack
- Tactical gear
- Workwear
- Denim
- Sports apparel
The available space and viewing distance can affect how much detail is appropriate.
For apparel applications, explore Custom Clothing Patches to compare suitable patch styles.
Avoid Unnecessary Effects
Digital artwork can contain effects that may not translate directly into every physical patch method.
Examples include:
- Heavy drop shadows
- Glows
- Extremely subtle gradients
- Transparency effects
- Tiny texture overlays
- Photographic shadows
- Extremely thin strokes
Before removing these elements, first decide which patch type you want.
For example, a gradient that may be difficult to represent using traditional embroidery could be more appropriate for a sublimated design.
The manufacturing method should guide the artwork rather than forcing every type of patch to reproduce the same digital effects.
Do Not Add Details Just Because There Is Empty Space
Good patch design does not require every area to be filled.
Too many elements can make a patch difficult to understand, especially at a small size.
A strong patch often has:
- One clear focal point
- Readable text
- Strong contrast
- Recognizable shapes
- Enough empty space
- A clear border
- Limited competing elements
If someone needs several seconds to understand the design, consider whether some elements can be simplified.
What If Your Artwork Is Low Quality?
Do not automatically abandon the project.
Instead, gather the best references you have.
For example, provide:
- Your highest-resolution logo
- Existing brand assets
- Previous patch photographs
- Website or social references
- Correct wording
- Preferred colors
- Desired dimensions
- Sketch showing the intended layout
The more context you provide, the easier it is to understand what you want the patch to represent.
Avoid repeatedly saving or editing a low-resolution JPG because each new compressed version can further reduce image quality.
What If You Only Have a Rough Sketch?
A rough sketch can still communicate important information.
Your sketch can show:
- Basic shape
- Text position
- Logo placement
- Symbol location
- Border concept
- Preferred proportions
Add written notes explaining anything that may not be obvious.
You can then submit the concept when requesting your custom patch quote.
PatchesOrder allows you to start with your own logo, artwork, or design concept, so professional production-ready artwork is not necessarily required before starting.
Should You Digitize Embroidery Artwork Yourself?
For most customers, no.
Embroidery digitizing is different from simply converting a JPG into a vector file.
Digitizing determines how a design will be interpreted as stitches.
Factors can include:
- Stitch direction
- Stitch sequence
- Stitch density
- Underlay
- Thread changes
- Design dimensions
Unless you already work with embroidery production files, it is usually more useful to provide clean original artwork and the desired patch specifications.
Always Review the Digital Proof
Artwork preparation does not end when you upload the file.
The digital proof is one of the most important stages before production.
Review it carefully.
Check:
- Overall patch shape
- Dimensions
- Spelling
- Numbers
- Lettering
- Logo proportions
- Colors
- Border
- Small details
- Element positioning
- Background
- Patch material
- Backing
- Overall balance
Do not approve the proof simply because the general idea looks correct.
Zoom in, then also view the design approximately at its intended physical size.
Ask for a correction if something does not match your requirements.
Common Artwork Mistakes to Avoid
Using a Tiny Logo From a Website
A small website image may not contain enough information for clear reproduction.
Use the original logo file whenever possible.
Making Text Too Small
Tiny wording may look readable while zoomed in but become unclear on the finished patch.
Using Too Many Fine Lines
Very fine lines can become difficult to reproduce depending on the patch material and physical size.
Ignoring the Final Patch Size
Artwork should be evaluated at approximately the size at which the patch will actually be produced.
Using Low-Contrast Colors
Similar foreground and background colors can reduce readability.
Placing Important Elements Too Close to the Edge
Allow room for the patch border and finishing.
Choosing a Patch Type After Designing Everything
Design with the manufacturing method in mind from the beginning.
Approving a Proof Without Checking the Text
Names, dates, numbers, and spelling should always receive a final review.
Artwork Preparation by Patch Type
Use this quick comparison when deciding how much detail to keep:
| Patch Type | Artwork Approach | Particularly Suitable For |
|---|---|---|
| Embroidered | Bold shapes, readable text, clear outlines | Traditional logos, uniforms, jackets |
| Woven | Fine lines and more detailed artwork | Small text, intricate logos, labels |
| PVC | Defined shapes and separated design areas | Bold logos, tactical and outdoor designs |
| Chenille | Large, simple, high-impact elements | Letters, numbers, varsity graphics |
| Leather | Clean logos and structured line work | Branding, denim, hats, fashion |
| Sublimation | High-resolution detailed artwork | Gradients, complex graphics, printed detail |
If you are unsure which construction fits your artwork, browse all Custom Patch Types before finalizing the design.
Information to Send With Your Artwork
Artwork alone does not tell the manufacturer everything about your project.
When requesting a quote, it helps to provide:
- Your artwork or design concept
- Preferred patch type
- Desired width and height
- Quantity
- Preferred colors
- Patch shape
- Intended application
- Desired backing
- Any important design notes
- Required deadline, if applicable
For example:
Patch type: Woven
Size: 3 inches wide
Quantity: 100
Use: Work jackets
Backing: Sew-on
Artwork note: Company blue must remain consistent
Important detail: Keep the small tagline readable
Providing context reduces ambiguity and makes the proofing process easier.
From Artwork to Finished Custom Patch
You do not need to make your artwork unnecessarily complicated before submitting it.
Start with the clearest version of your logo, illustration, emblem, or concept. Decide where the patch will be used, approximately how large it needs to be, and which visual details matter most.
Then select the manufacturing method that suits the design.
Choose Custom Embroidery Patches for a traditional stitched appearance, Custom Woven Patches when fine thread detail matters, Custom PVC Patches for molded designs, Custom Chenille Patches for bold varsity-style texture, Custom Leather Patches for a structured leather look, or Custom Sublimation Patches for highly detailed printed artwork.
If you are still deciding, start with the complete Custom Patches collection.
Once your design and specifications are submitted, review the digital proof carefully before the patch moves into production.
Ready to turn your artwork into a custom patch?
Request a Free Quote from PatchesOrder.
Frequently Asked Questions About Custom Patch Artwork
What file format is best for custom patches?
Vector formats such as AI, EPS, SVG, or vector PDF are useful because graphic elements can be resized without pixelation. High-quality PNG, JPG, TIFF, PSD, or other image files can also be useful depending on the artwork. If you do not have vector artwork, submit the clearest original file available.
Do I need vector artwork to order custom patches?
No. Vector artwork can make logo preparation easier, but it is not the only possible starting point. A clear raster image, logo, illustration, or even a design concept can provide the basis for reviewing a custom patch project.
Can I use a PNG for a custom patch?
Yes. A high-quality PNG can be useful, particularly when it contains a transparent background and sufficient image detail. Use the original high-resolution version rather than a small screenshot when possible.
Can I use a JPG for patch artwork?
Yes. A clear, high-resolution JPG can be used as source artwork. Avoid highly compressed or very small JPG files because important lines, lettering, and edges may become blurry.
What resolution should custom patch artwork be?
For raster artwork, use the highest-resolution original file available. Around 300 DPI at the intended design size is a useful general guideline, but actual pixel dimensions, artwork clarity, finished size, and patch type also matter.
Can PatchesOrder make a patch from my logo?
Yes. You can submit your logo as the basis for a custom patch. Browse Custom Patches to compare the available patch constructions.
Can a patch be made from a drawing or sketch?
A drawing or sketch can be used to communicate your design concept. Include clear notes about wording, colors, shape, size, and other important elements so the intended design is easier to understand.
Which patch type is best for a detailed logo?
Custom Woven Patches are well suited to fine lines and small lettering. Custom Sublimation Patches can also accommodate highly detailed printed artwork. The better option depends on the appearance you want.
Are embroidered patches suitable for very small text?
Embroidery works particularly well for bold lettering and traditional stitched designs. If your logo contains unusually fine lines or small text, consider whether a woven patch would preserve those elements more effectively. See our Woven vs. Embroidered Patches comparison for more detail.
Should I remove the background from my artwork?
If the background is not supposed to appear in the patch, clearly indicate that it should be removed. A transparent PNG or vector file can make the intended boundaries easier to understand.
Will I see the design before my patches are produced?
PatchesOrder provides a digital proof for review before production. Check the artwork, spelling, colors, dimensions, proportions, border, and other specifications before approving it.
