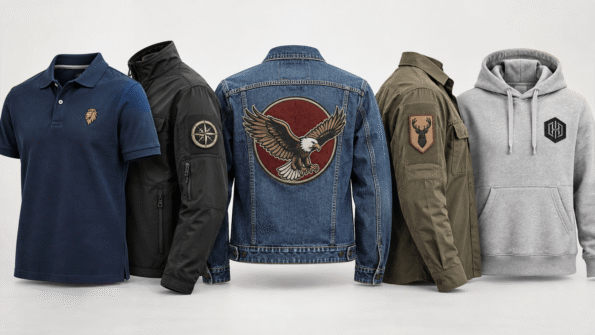
Choosing the right custom patch size is not simply a matter of making your logo as large as possible.
The patch needs to fit the specific area where it will be attached.
A 3-inch patch may work perfectly on the chest of a jacket but look too large on the side of a cap. A 10-inch design may work across a jacket back but would be completely unsuitable for a polo shirt, sleeve, or tactical hat.
Patch size can also affect:
- Logo visibility
- Text readability
- Garment comfort
- Patch flexibility
- Placement
- Border proportions
- Artwork detail
- Overall appearance
This custom patch size guide gives you practical starting dimensions for chest patches, sleeve patches, hat patches, jacket back patches, uniforms, backpacks, workwear, tactical gear, and other common placements.
The measurements below are general starting points rather than fixed rules. Always measure the actual garment or product before approving your patch size.
If you are ready to create a design, explore all Custom Patches available from PatchesOrder.
Custom Patch Size Chart by Placement
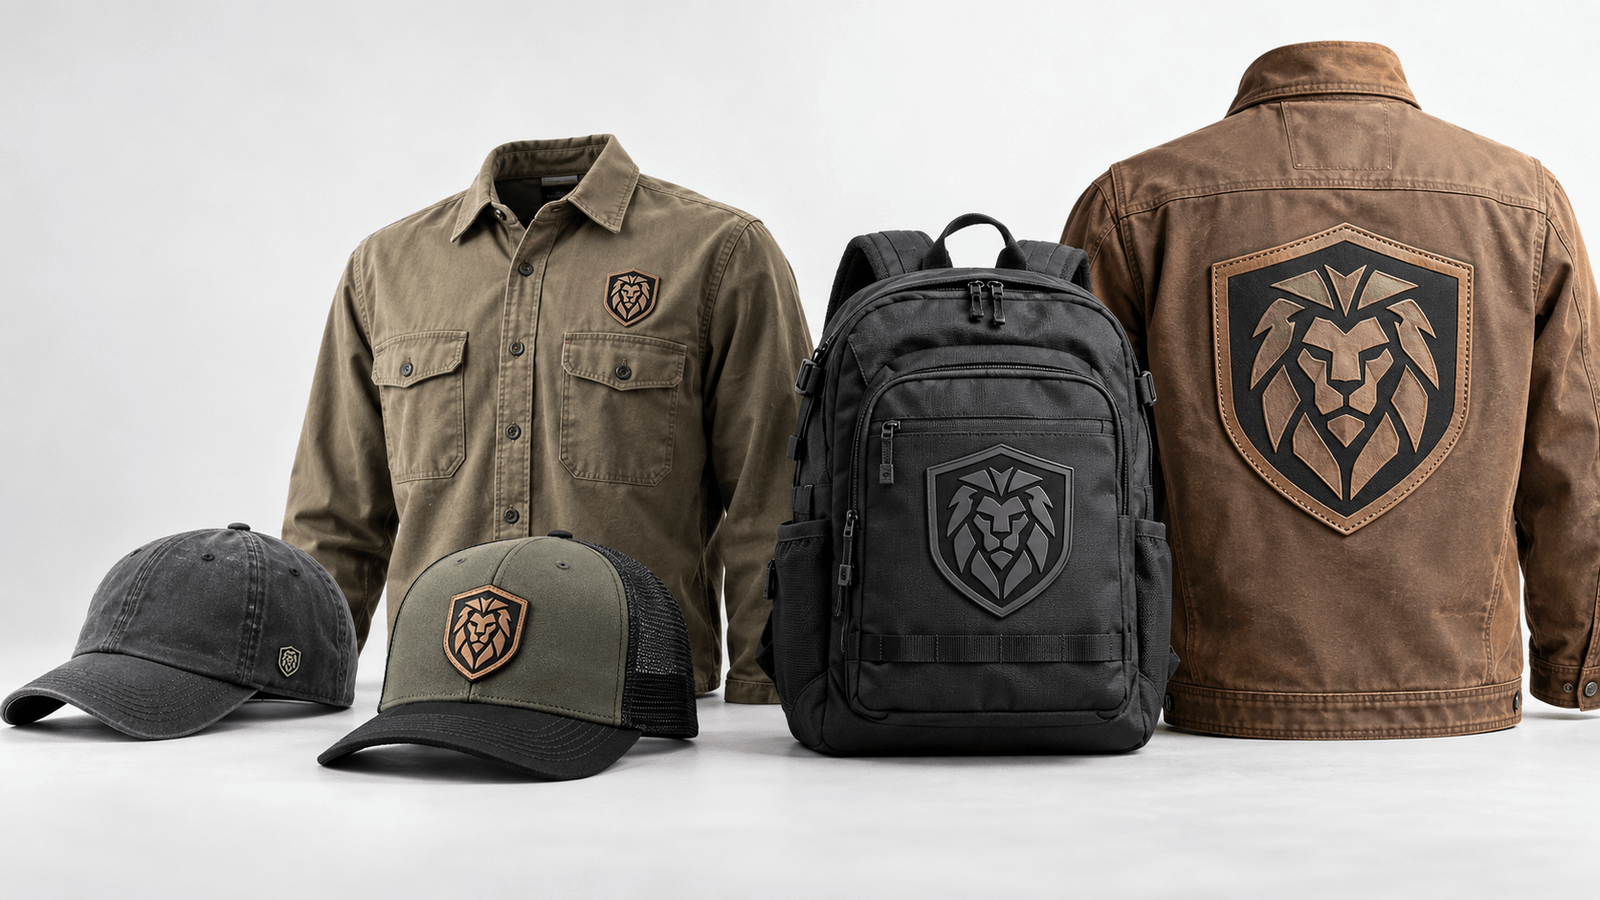
Here is a quick reference before we look at each placement in detail.
| Patch Placement | Suggested Starting Size |
|---|---|
| Shirt or polo chest | 2–3.5 inches |
| Jacket chest | 2.5–4 inches |
| Name patch | 3–5 inches wide |
| Sleeve | 2–4 inches |
| Shoulder | 2.5–4 inches |
| Hat front | 2–3.5 inches wide |
| Hat side | 1–2 inches |
| Beanie cuff | 1.5–3 inches wide |
| Jacket back | 8–12 inches |
| Large statement back patch | 10–14 inches |
| Backpack | 2–5 inches |
| Tactical / morale patch | 2–4 inches |
| Uniform identification | 2.5–4 inches |
| Pocket area | 2–3.5 inches |
These ranges should be treated as starting points.
The correct finished dimensions depend on the available surface, artwork shape, amount of text, patch material, border, garment size, and intended appearance.
How Is Custom Patch Size Measured?
Custom patches are usually specified using their physical dimensions.
For example:
3″ × 2″
means the patch is approximately:
- 3 inches wide
- 2 inches high
A circular patch may simply be described by its diameter:
3-inch round patch
A square patch could be:
3″ × 3″
An irregular custom shape should normally be measured according to its widest and tallest points.
When sending your dimensions, clearly identify which measurement represents the width and which represents the height.
Why Patch Placement Should Determine Size
The same logo can require different dimensions depending on where it will be used.
Consider one company logo being used on:
- A polo shirt
- A trucker hat
- A jacket sleeve
- A backpack
- The back of a work jacket
Using exactly the same patch dimensions across every item may produce inconsistent results.
A better approach is:
Design → Placement → Available Space → Patch Size
rather than choosing a patch size first and trying to make every item accommodate it.
For apparel projects, you can compare garment applications on the Custom Clothing Patches page.
Best Patch Size for the Chest
Chest placement is one of the most common options for company logos, employee identification, clubs, uniforms, workwear, teams, and branded apparel.
A useful starting range is approximately:
2 to 3.5 inches
For heavier jackets, slightly larger patches around:
2.5 to 4 inches
may also work well.
The correct size depends on whether the patch is:
- Circular
- Square
- Rectangular
- Logo-shaped
- Name-based
- Badge-shaped
Left Chest Patch Size
Left chest placement is popular for:
- Company logos
- Uniform patches
- Team logos
- Brand marks
- Club emblems
For many shirts and polos, a patch around 2.5 to 3.5 inches can provide good visibility without dominating the garment.
Larger logos may work on jackets where more surface area is available.
Right Chest Patch Size
The same general size range applies to the right chest.
However, check whether the garment includes:
- Pockets
- Zippers
- Seams
- Existing embroidery
- Buttons
- Reflective elements
These features can reduce the usable patch area.
Best Size for Name Patches
Rectangular name patches are common on:
- Work shirts
- Uniforms
- Jackets
- Tactical clothing
- Mechanic uniforms
- Security apparel
A useful starting point is approximately:
3 to 5 inches wide
and
1 to 2 inches high
The amount of text matters significantly.
For example:
SAM
needs less horizontal space than:
ALEXANDER MARTINEZ
If the patch contains:
- Full name
- Job title
- Department
- Company name
you may need a wider design or more than one line.
For very small lettering, consider whether Custom Woven Patches would reproduce the text more clearly than a heavily textured embroidered design.
You can also read our Woven vs. Embroidered Patches Guide when deciding how much detail your chosen size can support.
Best Patch Size for Shirt and Polo Placement
Patches on shirts and polos should generally remain proportionate to the garment.
A useful starting range is:
2 to 3.5 inches
Common positions include:
- Left chest
- Right chest
- Above pocket
- Sleeve
- Upper arm
Lightweight garments usually benefit from patches that do not feel unnecessarily heavy or oversized.
A very large, thick patch can affect the way a lightweight polo or shirt hangs.
If the main application is apparel, explore Custom Clothing Patches before deciding on material and dimensions.
Best Patch Size for Jacket Chest Placement
Jackets usually offer more structure than shirts.
This means they can often accommodate a slightly larger patch.
A practical starting range is:
2.5 to 4 inches
This works particularly well for:
- Company logos
- Motorcycle-style chest patches
- Club emblems
- Team badges
- Workwear logos
- Brand patches
The patch still needs to avoid:
- Zippers
- Pockets
- Seams
- Snaps
- Decorative panels
Before finalizing the patch, measure the actual usable chest area rather than the full width of the jacket.
Best Patch Size for Jacket Backs
The back of a jacket gives you substantially more space.
For a medium-to-large jacket back design, a useful starting range is:
8 to 12 inches wide
Large statement patches may extend toward:
10 to 14 inches
depending on the jacket and artwork.
Jacket back patches are commonly used for:
- Clubs
- Motorcycle-style designs
- Large company branding
- Fashion artwork
- Team graphics
- Organization logos
- Large mascots
How Large Should a Jacket Back Patch Be?
Do not simply measure the full jacket width.
Identify the clear area between:
- Side seams
- Shoulder seams
- Waistband
- Hood
- Back yoke
- Decorative stitching
The patch should look intentionally positioned rather than squeezed into the available space.
A paper template is particularly useful here.
Cut a sheet of paper to your proposed patch dimensions and place it on the jacket.
Then evaluate it from several feet away.
This is often much more useful than judging the size entirely from a computer screen.
Best Patch Size for Sleeves
Sleeve patches are common on:
- Uniforms
- Jackets
- Workwear
- Team apparel
- Tactical clothing
- Club garments
A practical starting range is approximately:
2 to 4 inches
Round and shield-shaped patches often work well in this area because they can fit within the narrower sleeve surface.
Before selecting size, measure:
- Sleeve width
- Distance from shoulder seam
- Available area above elbow
- Existing pockets
- Zippers
- Reflective elements
Avoid making the patch so large that it wraps excessively around the arm.
Best Patch Size for Shoulder Placement
Shoulder and upper-arm patches are frequently used for:
- Unit insignia
- Organization patches
- Police-style patches
- Security identification
- Team emblems
- Department patches
A common starting range is:
2.5 to 4 inches
The exact size should follow the garment.
A large winter jacket may accommodate a bigger shoulder patch than a fitted short-sleeve uniform shirt.
If your design relates to military-style or organizational patches, see our Army Unit Patches Guide for additional information about design, placement, materials, and backing.
Best Patch Size for Hats
Hat sizing requires more care because the available space is limited and curved.
For a centered front patch, a useful starting range is approximately:
2 to 3.5 inches wide
Height often needs to remain around:
1 to 2.5 inches
depending on the hat construction.
The actual front panel is more important than any general size chart.
Our complete Custom Hat Patches Guide explains hat measurements, materials, backings, panel curvature, and placement in more detail.
Trucker Hat Patch Size
Structured trucker hats can provide a relatively useful front branding area.
A rectangular, oval, shield, leather, or embroidered patch may commonly fall within approximately:
2 to 3.5 inches wide
The height should remain proportionate to the crown.
Do not let the patch interfere with:
- Center seams
- Bill seam
- Crown curvature
- Ventilation
- Existing branding
Custom Leather Patches are particularly popular for trucker-style and outdoor branding because they can create a clean, structured appearance.
Baseball Cap Patch Size
Baseball caps frequently have more crown curvature than flat-front structured hats.
A useful starting range is:
2 to 3.25 inches wide
The patch should sit comfortably within the available front panel rather than bending sharply across multiple seams.
Custom Embroidery Patches and Custom Woven Patches are both worth considering for cap logos, depending on the level of detail required.
Tactical Hat Patch Size
Tactical hats often contain a predefined loop panel.
In that situation, the patch should be sized according to the loop field rather than the full hat front.
Common tactical designs may fall around:
2 × 3 inches
or similar compact rectangular dimensions.
But measure the actual panel before ordering.
Hook-and-loop patches that extend beyond the loop area may not attach properly.
Custom PVC Patches can be a useful option for tactical and outdoor designs where a molded appearance is preferred.
Side Hat Patch Size
Side-panel patches are generally much smaller than front patches.
A useful starting range is:
1 to 2 inches
This placement works well for:
- Small logos
- Initials
- Flags
- Symbols
- Secondary branding
Because the area is small, simplify the artwork and avoid unnecessary text.
Beanie Patch Size
Beanie patches are often positioned on the cuff or front.
A useful starting range is approximately:
1.5 to 3 inches wide
Leather, woven, and embroidered patches are common visual choices.
Because knit fabrics stretch, avoid making the patch disproportionately large or rigid.
Best Patch Size for Uniforms
Uniform patches should be easy to identify without interfering with movement or garment construction.
Common uniform placements include:
- Chest
- Shoulder
- Upper sleeve
- Name area
- Back
For general uniform logos and badges, a useful range is:
2.5 to 4 inches
Name patches may be wider and shorter.
For example:
4″ × 1.5″
may suit a rectangular identification design better than a 3-inch circle.
Consistency is particularly important for organization-wide orders.
Record the approved:
- Width
- Height
- Placement distance
- Patch type
- Backing
- Colors
This helps keep multiple uniforms consistent.
Best Patch Size for Tactical and Morale Patches
Tactical and morale patches are often designed around predefined hook-and-loop panels.
Useful starting sizes include:
- 2″ × 3″
- 2″ × 3.5″
- 3″ × 3″
- 3″ round
These are examples rather than universal standards.
Always measure the actual loop surface on:
- Tactical hats
- Plate carriers
- Uniforms
- Backpacks
- Range bags
- Tactical jackets
PVC is a popular material for this application because it can produce clean shapes and raised details. Learn more in our Why Choose PVC Patches? guide.
Best Patch Size for Backpacks
Backpacks provide several possible placement areas.
These include:
- Upper front panel
- Lower front panel
- Strap
- Loop field
- Side panel
A practical starting range is:
2 to 5 inches
A small daypack may look better with a 2–3 inch patch, while a larger tactical or travel pack may accommodate something larger.
Do not place patches where they interfere with:
- Zippers
- Compression straps
- Buckles
- Pockets
- Carry handles
If the backpack already includes a loop field, size the patch according to that specific area.
Best Patch Size Above a Pocket
Patches positioned above shirt or jacket pockets generally need to remain compact.
A useful range is:
2 to 3.5 inches
Long rectangular logos may need more width but less height.
Make sure the patch does not prevent the pocket from opening normally.
Best Size for Small Logo Patches
Small logo patches generally fall around:
1.5 to 3 inches
They work well for:
- Caps
- Sleeves
- Small chest logos
- Accessories
- Brand labels
- Bags
However, reducing the patch size may require simplifying the artwork.
The smaller the patch becomes, the less physical space exists for:
- Tiny lettering
- Thin lines
- Complex borders
- Multiple symbols
- Intricate illustrations
If your logo contains fine detail, Custom Woven Patches can often accommodate finer thread detail than traditional embroidery.
Best Size for Large Logo Patches
Large logo patches may range from:
5 inches upward
depending on placement.
These sizes are more appropriate for:
- Jacket backs
- Large bags
- Banners or display applications
- Oversized fashion designs
- Club jackets
Increasing size can provide more room for detail, but the patch still needs to remain comfortable and flexible enough for its intended use.
Patch Size by Placement at a Glance
| Placement | Small | Medium | Large |
|---|---|---|---|
| Chest | 2″ | 3″ | 4″ |
| Sleeve | 2″ | 3″ | 4″ |
| Shoulder | 2.5″ | 3″ | 4″ |
| Hat Front | 2″ | 2.75″ | 3.5″ |
| Hat Side | 1″ | 1.5″ | 2″ |
| Beanie | 1.5″ | 2″ | 3″ |
| Backpack | 2″ | 3–4″ | 5″ |
| Tactical Gear | 2″ | 3″ | 4″ |
| Jacket Back | 8″ | 10″ | 12″+ |
Use this table as a starting reference only.
The garment and artwork should make the final decision.
How Patch Shape Affects Size
Two patches with the same width can appear completely different.
For example:
- A 3-inch circle
- A 3″ × 1″ rectangle
- A 3-inch shield
- A 3-inch custom silhouette
all occupy different amounts of visual space.
This is why choosing size by only one measurement can be misleading.
Consider both:
Width × Height
and the overall shape.
Round Patches
Round patches often work well for:
- Sleeves
- Chest
- Hats
- Clubs
- Teams
- Uniforms
A 2.5–3.5 inch circle is relatively versatile for many garment applications.
Rectangular Patches
Rectangular patches work well for:
- Names
- Company wording
- Tactical identification
- Workwear
- Flag designs
The width may be significantly greater than the height.
Shield Patches
Shield shapes are frequently used for:
- Security
- Organizations
- Clubs
- Uniform-style designs
These often work well in vertical placements such as sleeves and shoulders.
Custom Shapes
Custom-cut patches can follow:
- Mascots
- Logos
- Objects
- Letters
- Symbols
When using an unusual shape, measure its maximum width and height to confirm the available placement area.
How Patch Material Affects Size
Patch size should also match the manufacturing method.
Embroidered Patches
Custom Embroidery Patches use thread to create raised texture.
They work particularly well when the artwork has:
- Strong shapes
- Bold text
- Defined borders
- Clear logos
Very small embroidered patches may require simplified artwork.
Woven Patches
Custom Woven Patches use finer threads and can support more detailed graphics.
This makes woven construction particularly useful for smaller patches containing:
- Fine lines
- Small lettering
- Detailed logos
Read our Woven vs. Embroidered Patches comparison if size and artwork detail are your main concerns.
PVC Patches
Custom PVC Patches use molded material and can work effectively for:
- Tactical patches
- Outdoor logos
- Bags
- Equipment
- Uniforms
Small PVC designs should still use adequately sized text and separated design elements.
Chenille Patches
Custom Chenille Patches have a thicker, raised texture.
They are often better suited to larger:
- Letters
- Numbers
- Mascots
- Varsity designs
Chenille generally benefits from more physical space than an extremely detailed woven patch.
Leather Patches
Custom Leather Patches work particularly well for:
- Hats
- Denim
- Jackets
- Bags
- Brand labels
Smaller leather patches often use simplified logos or wordmarks so the design remains recognizable.
Sublimation Patches
Custom Sublimation Patches can reproduce complex printed artwork and gradients.
This gives greater flexibility for visual detail, but very small text still needs to remain readable at the final physical size.
How Artwork Detail Affects Patch Size
One of the biggest reasons to increase patch dimensions is artwork complexity.
A simple logo containing:
- One symbol
- Three letters
- Two colors
can often work at a smaller size.
A design containing:
- Long wording
- Small dates
- Multiple symbols
- Detailed mascot
- Border text
- Several colors
may require more space.
Do not shrink complicated artwork simply to fit a predetermined patch dimension.
You may get a better result by either:
- Increasing the patch size, or
- Simplifying the design.
Text Size Matters
Text that looks readable on a computer monitor can become difficult to recognize when turned into a small physical patch.
This is especially relevant for:
- Names
- Dates
- Slogans
- Unit numbers
- Locations
- Website names
- Department titles
Before approving the artwork, view the digital proof at approximately its real-world size.
If the wording becomes difficult to read on screen at that scale, reconsider the dimensions or design complexity.
Measure the Placement Area Before Ordering
Never rely only on a generic size chart.
Use a ruler or measuring tape to determine:
- Maximum available width
- Maximum available height
- Distance from nearby seams
- Distance from pockets
- Distance from zippers
- Surface curvature
Then reduce those maximum dimensions slightly to provide visual breathing room.
The patch does not need to fill every inch of available space.
Use a Paper Template Before Ordering
One of the simplest ways to test patch size is to create a paper template.
For example, if you are considering a:
3″ × 2″ patch
cut a piece of paper to exactly:
3″ × 2″
Place it on the intended:
- Shirt
- Jacket
- Hat
- Sleeve
- Backpack
- Uniform
Then look at it from a normal viewing distance.
You can test several sizes before deciding.
For a jacket back, compare:
- 8 inches
- 10 inches
- 12 inches
For a hat, compare:
- 2 inches
- 2.5 inches
- 3 inches
This inexpensive test can prevent ordering patches that feel too large or too small once produced.
Consider Backing When Choosing Patch Size
The attachment method can also influence size.
For example:
Hook-and-Loop
The patch should fit within the available loop field.
Iron-On
The application surface should be relatively smooth and capable of receiving consistent heat and pressure.
Sew-On
The edge needs to remain accessible for stitching.
Adhesive
More of the patch backing should make good contact with the surface.
Backing should therefore be considered together with placement and dimensions rather than selected independently.
Consider Garment Movement
Large patches can affect how flexible an item feels.
Pay attention to areas that:
- Bend
- Stretch
- Fold
- Flex
- Compress
For example, a large rigid patch placed directly over an elbow or another high-movement area may be uncomfortable.
Flat and relatively stable areas usually make better patch locations.
Keep Patch Size Consistent Across Bulk Orders
For businesses, teams, schools, clubs, and organizations, consistency matters.
Once a patch size has been approved, record:
- Width
- Height
- Shape
- Colors
- Border
- Backing
- Placement
- Patch material
If multiple garment sizes are being used, determine whether one patch size will work across all garments.
A patch that looks balanced on an XL jacket may appear oversized on an XS shirt.
In some projects, two patch sizes may produce a more consistent overall appearance.
Common Patch Sizing Mistakes
Choosing Size Before Choosing Placement
Decide where the patch will go first.
Then measure the area.
Judging Size Only on a Computer Screen
Digital zoom can make a small patch design look much larger than it really is.
Review artwork at approximately actual size.
Ignoring Seams
Hat, sleeve, pocket, and jacket seams can interfere with placement.
Making Hat Patches Too Large
Caps provide less usable space than many people expect because of curvature and panel construction.
Read the Custom Hat Patches Guide before finalizing headwear dimensions.
Making Text Too Small
If the patch contains important wording, make sure the physical size can support readable lettering.
Making Lightweight Clothing Patches Too Heavy
Large, thick patches may affect lightweight fabric differently from a structured jacket.
Filling the Entire Available Area
Leaving some space around the patch often produces a cleaner appearance.
How to Choose Your Custom Patch Size
Use this process before ordering:
Step 1: Choose the Placement
Decide whether the patch will go on the:
- Chest
- Sleeve
- Shoulder
- Hat
- Jacket back
- Backpack
- Uniform
- Tactical gear
Step 2: Measure the Available Area
Measure the usable width and height.
Ignore areas occupied by seams, pockets, zippers, or curves.
Step 3: Review Your Artwork
Ask whether the design contains:
- Small text
- Complex details
- Multiple borders
- Detailed illustration
- Long wording
More complex artwork may require more space.
Step 4: Choose the Patch Material
Compare available Custom Patches and choose the construction that works with your design.
Step 5: Create a Paper Template
Cut out the proposed dimensions and place the template on the actual item.
Step 6: Review the Digital Proof
Before production, check:
- Width
- Height
- Shape
- Text readability
- Border
- Artwork proportions
- Placement suitability
PatchesOrder provides a digital proof before production, allowing the design and specifications to be reviewed before manufacturing.
Find the Right Patch Size for Your Project
There is no universal custom patch size that works for every garment, hat, backpack, or piece of equipment.
The best dimensions come from combining:
Placement + Available Space + Artwork + Material + Backing
A small 2-inch patch can be perfect for a cap side or compact sleeve logo.
A 3-inch design can work well across many chest, hat, shoulder, and uniform applications.
A large 8–12 inch patch may be appropriate for a jacket back.
But the actual product should always be measured before final dimensions are approved.
Explore Custom Patches to compare embroidered, woven, PVC, chenille, leather, sublimated, and other available patch styles.
For apparel applications, visit Custom Clothing Patches.
You can also choose directly from:
- Custom Embroidery Patches
- Custom Woven Patches
- Custom PVC Patches
- Custom Chenille Patches
- Custom Leather Patches
- Custom Sublimation Patches
Ready to create your custom patch?
Request a Free Quote from PatchesOrder.
Frequently Asked Questions About Custom Patch Sizes
What is the most common size for a custom patch?
There is no universal size because patches are made for different placements. Around 2–4 inches covers many chest, sleeve, hat, uniform, and general apparel applications, while large jacket-back patches require considerably more space.
What size should a chest patch be?
Approximately 2–3.5 inches is a useful starting range for shirt and polo chest patches. Structured jackets may accommodate patches around 2.5–4 inches depending on the available area.
What size patch should I use for a hat?
Front hat patches commonly start around 2–3.5 inches wide, but the actual front panel should always be measured. Crown curvature, seams, and hat style affect the available space. See our Custom Hat Patches Guide for detailed headwear guidance.
What size should a jacket back patch be?
Approximately 8–12 inches wide can be a useful starting range for many jacket-back designs, while larger statement patches may reach around 10–14 inches depending on the garment. Always measure the clear back area before ordering.
What size should a sleeve patch be?
Approximately 2–4 inches is a practical starting range. The actual size depends on sleeve width, garment size, patch shape, and whether the design needs to fit above pockets or other features.
What size is good for a tactical patch?
Compact sizes around 2–4 inches are common for tactical-style applications. If the patch will use hook-and-loop backing, measure the existing loop field and keep the patch within that area.
What size should a name patch be?
Name patches commonly need more width than height. Approximately 3–5 inches wide and 1–2 inches high can be a useful starting range depending on the name length and typography.
Is a 3-inch patch too big for a hat?
Not necessarily. A 3-inch-wide patch can work well on many structured hats, but some caps have smaller or more curved panels. Measure the usable panel before deciding.
Is a 4-inch patch too big for a shirt?
A 4-inch patch may look relatively large on a lightweight shirt or polo but could work on some jackets, uniforms, or oversized garments. Use a paper template on the actual clothing to judge proportions.
Does patch size affect price?
Patch dimensions can influence material use and production requirements, along with factors such as quantity, patch type, artwork complexity, backing, and finishing options. Request a quote using your actual specifications rather than estimating cost from size alone.
Can detailed artwork fit on a small patch?
Sometimes, but complex artwork may need to be simplified. Woven or sublimated construction can also be worth considering when the design relies on fine detail. Custom Woven Patches are especially useful when smaller lettering and fine thread detail matter.
Should I measure my garment before ordering patches?
Yes. Measuring the actual placement area is the safest approach. Check width, height, seams, pockets, zippers, curvature, and nearby design elements before approving the patch dimensions.
Can I use the same patch size on hats and jackets?
You can, but it may not produce the best proportions. Hat panels have limited space and curvature, while jackets provide larger flat areas. It is often better to adapt the same artwork to different patch dimensions for each application.
