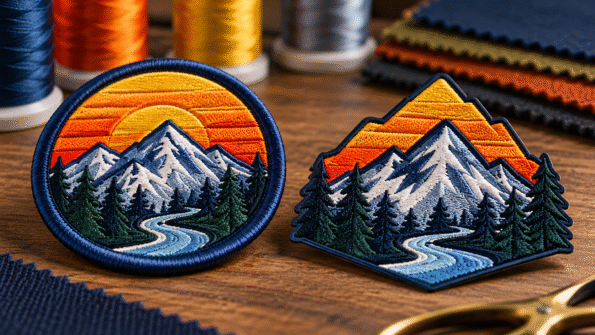
The border changes more than the outside edge of an embroidered patch. It affects the patch’s shape, profile, and overall visual style.
For embroidered patches, the two common approaches are merrowed borders and heat-cut edges.
A merrowed border creates a thicker stitched rim and usually works best with simple shapes such as circles, ovals, squares, rectangles, and straightforward badges. A heat-cut edge creates a flatter outline that can follow sharper corners, narrow points, and more complex custom shapes.
If you are comparing embroidered patch options more broadly, start with our Custom Embroidered Patch Guide.
Merrowed vs Heat-Cut Borders at a Glance
| Feature | Merrowed Border | Heat-Cut Edge |
|---|---|---|
| Appearance | Thick, raised stitched rim | Flat, closely trimmed edge |
| Best shape | Simple, regular shapes | Detailed or custom shapes |
| Rounded edges | Excellent fit | Possible |
| Sharp corners | Limited | Better suited |
| Narrow points | Less suitable | Better suited |
| Traditional patch look | Strong | Cleaner, more modern outline |
| Visible border | Prominent | Subtle |
| Complex cut line | Limited | Can follow complex outlines |
Neither option is automatically better. The correct edge depends on the artwork and the shape you want the finished embroidered patch to have.
What Is a Merrowed Border?
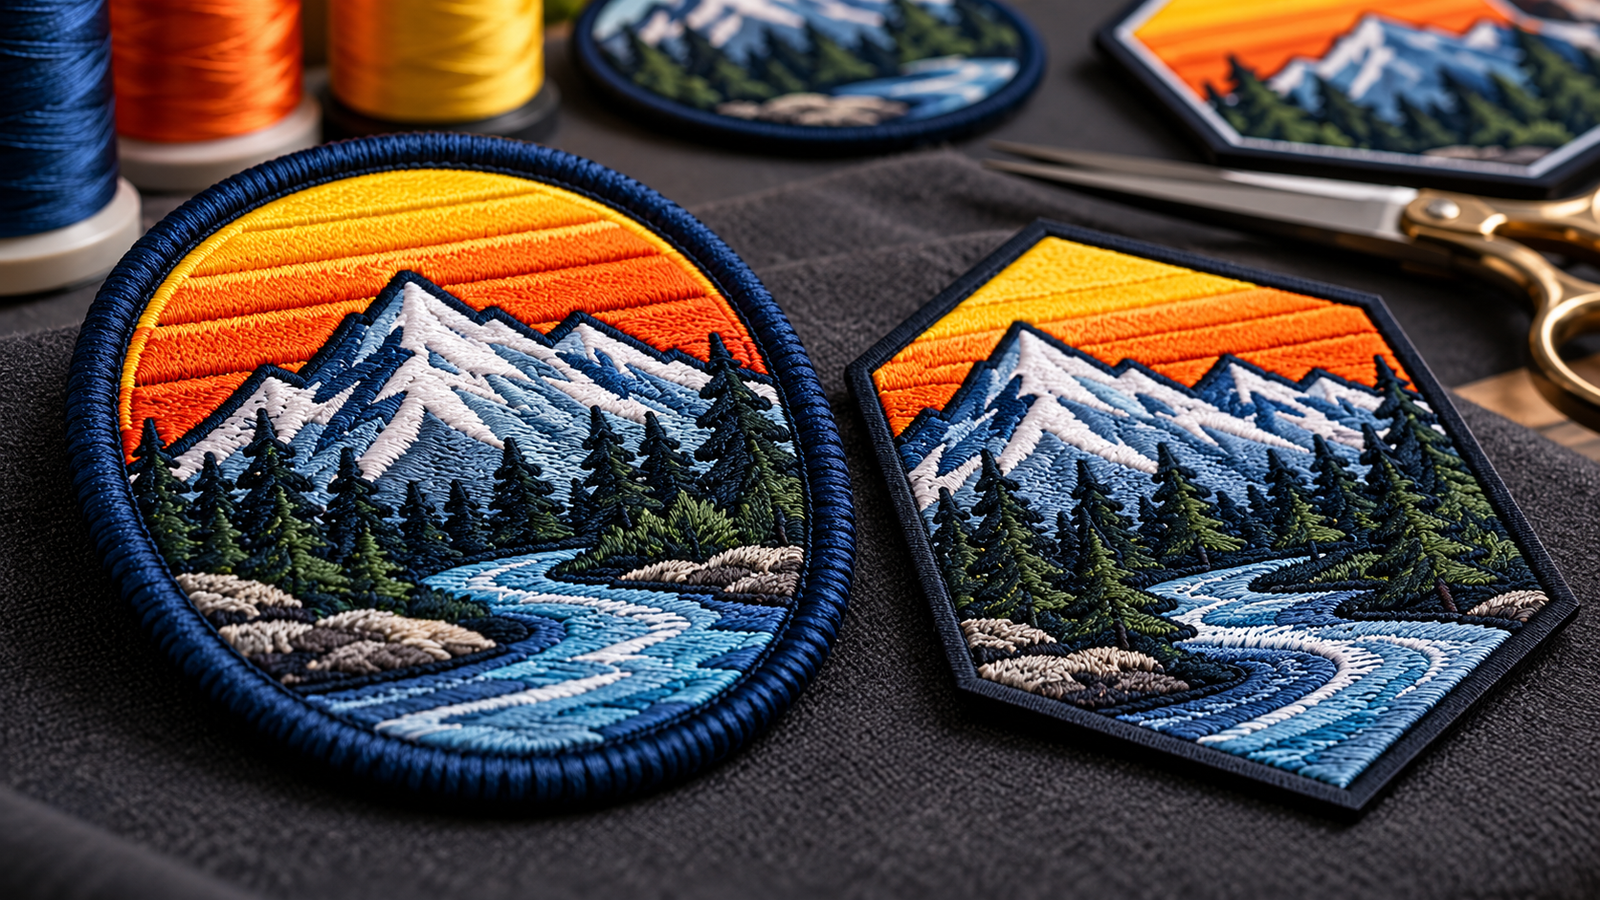
A merrowed border is a dense stitched edge wrapped around the outside perimeter of a patch.
It creates the familiar raised rim seen on many traditional embroidered badges, club patches, uniform emblems, and circular logo patches.
The border becomes part of the design rather than simply finishing the edge.
A merrowed edge works especially well when the patch has a clean, continuous outline.
Examples include:
- Circles
- Ovals
- Rectangles
- Squares with softened corners
- Shields with simple outlines
- Standard badge shapes
Imagine a round embroidered club emblem with lettering around the outside. A thick stitched border gives that design a finished, traditional appearance.
Why Simple Shapes Work Better With Merrowing
A merrowed border needs enough room to travel continuously around the outside edge.
That becomes harder when the patch contains:
- Very sharp points
- Deep inward corners
- Narrow projections
- Irregular contours
- Small cut-ins
Consider two designs.
Design A: Circular company badge.
Design B: Lightning-bolt logo with several sharp points.
The circular badge gives the border a smooth route around the patch. The lightning bolt requires the edge to turn sharply several times.
The second design is generally a better candidate for a cut edge.
What Is a Heat-Cut Edge?
A heat-cut embroidered patch is trimmed around the required outline rather than finished with a thick overlocked rim.
Depending on the production method, the edge is cut and sealed so the patch can follow the artwork’s shape more closely.
The finished edge is usually flatter and less visually dominant than a merrowed border.
This makes heat-cut construction useful when the silhouette itself is part of the design.
Common examples include:
- Stars
- Wings
- Animals
- Letters
- Mascot outlines
- Mountains
- Flames
- Equipment shapes
- Irregular logos
If a business logo resembles a wrench, shield with pointed corners, animal head, or custom emblem, a cut edge may preserve its silhouette better than surrounding it with a thick rounded border.
Heat-Cut Edges Handle Sharp Corners Better
Sharp geometry is one of the strongest reasons to consider a heat-cut edge.
Suppose an embroidered patch contains a five-point star.
A heavy border wrapped around every point can soften the shape visually. A cut edge can follow those points more closely.
The same applies to:
- Triangular corners
- Narrow tails
- Angular letters
- Geometric logos
- Directional shapes
The more important the outer contour is to recognizing the design, the more attention you should give to the edge method.
How Twill Affects the Border Decision
Embroidered patches are commonly stitched onto a fabric base such as twill.
Depending on the design and embroidery coverage, some of that base fabric may remain visible.
That matters because the border defines where the twill ends.
With a Merrowed Border
The raised stitched rim visually separates the embroidered face from the outside edge.
This can work especially well with traditional badge-style designs where visible twill is intentionally part of the appearance.
With a Heat-Cut Edge
The fabric base can be trimmed closer to the custom silhouette.
This allows the outer shape to feel more connected to the artwork rather than being surrounded by a separate thick border.
The choice should therefore consider the entire patch face—not just the edge.
Border Style and Embroidery Coverage
Border style and embroidery coverage are separate decisions, but they influence how the finished patch looks.
A design with visible twill and a thick merrowed border may have a classic uniform-patch appearance.
A heavily embroidered custom-shape patch with a cut edge can feel more like a standalone embroidered emblem.
Neither look represents higher quality.
They simply create different visual results.
When to Choose a Merrowed Border
Consider a merrowed border when:
- The patch has a simple shape.
- You want a traditional embroidered appearance.
- A visible stitched rim supports the artwork.
- The outline does not contain complicated turns.
- The border itself should feel like part of the design.
Typical examples could include a round motorcycle club emblem, oval business badge, rectangular name patch, or simple shield.
When to Choose a Heat-Cut Edge
Consider a heat-cut edge when:
- The design has a custom silhouette.
- Sharp corners need to remain defined.
- The shape contains several points.
- A thick border would overpower the artwork.
- You want the outer contour to follow the logo closely.
It is particularly useful when changing the outside shape would change how the logo is recognized.
Think About Cut Lines During Artwork Preparation
The production edge should not be an afterthought.
When preparing an embroidered design, identify the intended outside cut line clearly.
Ask:
- Where should the patch actually end?
- Is the outer shape part of the logo?
- Are there extremely narrow sections?
- Are there sharp inward corners?
- Does the artwork need a visible border around it?
- Would simplifying the silhouette improve production?
A complicated digital outline may still need adjustment before it becomes a practical physical patch.
The goal is to retain the character of the design without creating unnecessary edge complexity.
Do Not Confuse a Printed Outline With a Physical Border
Artwork sometimes contains an outline around the logo.
That does not automatically mean the finished patch should use a merrowed border.
You could have:
- An embroidered outline inside a heat-cut patch
- A merrowed border around an embroidered design
- No contrasting visual outline at all
Think separately about the graphic outline and the physical edge construction.
They perform different jobs.
Visual Example: Round Badge
Imagine a circular embroidered patch with:
- Navy twill
- White lettering
- Central mascot
- Red outer edge
A merrowed border would reinforce the circular form and create a strong traditional badge appearance.
The thick outer rim works naturally because the edge has no difficult corners.
Visual Example: Mountain Logo
Now imagine a mountain silhouette with:
- Three pointed peaks
- Sloping sides
- Irregular lower contour
Adding a heavy rounded border could soften the peaks and change the overall silhouette.
A heat-cut edge can follow the mountain outline more closely.
This is where shape becomes the deciding factor.
Review the Border in Your Proof
Before approving an embroidered patch, look carefully at:
- Overall shape
- Border thickness
- Corner definition
- Distance between artwork and edge
- Text near the perimeter
- Small projections
- Narrow sections
- Cut line
Do not review only the center logo.
The outside edge controls the final physical silhouette.
If the proposed border changes how the design reads, ask whether another edge treatment would suit the artwork better.
Which Embroidered Patch Border Should You Choose?
Choose based on shape first and appearance second.
A simple circle, oval, rectangle, or traditional badge usually works naturally with a merrowed border.
A logo with sharp corners, points, irregular contours, or a distinctive silhouette is generally better suited to a heat-cut edge.
If you are still comparing edge construction across different patch styles, see our Patch Border Types Guide.
For a broader overview of embroidery artwork, coverage, backing, and design decisions, read the Custom Embroidered Patch Guide.
Ready to create your own design? Explore Custom Embroidery Patches and request a free quote with your artwork, size, quantity, and preferred shape.
Frequently Asked Questions
What is the difference between a merrowed and heat-cut patch border?
A merrowed border creates a raised stitched rim around the patch. A heat-cut edge is flatter and can follow more detailed custom shapes and sharper corners.
Which border is better for a round embroidered patch?
A merrowed border is often a natural fit for circles and other simple shapes because the stitching can travel smoothly around the perimeter.
Can a merrowed border follow sharp points?
Merrowed borders are generally better suited to simple continuous shapes. Designs with narrow points or complex corners may be better candidates for a cut edge.
Are heat-cut edges only for irregular patches?
No. They can also be used on simpler shapes when a flatter, less prominent edge is preferred.
Does a heat-cut patch still have an embroidered border?
It can include an embroidered outline within the artwork, but that is different from using a raised merrowed edge around the physical perimeter.
Does the border affect the embroidered design?
Yes. Border thickness, cut line, available space, and patch shape can affect how close lettering or artwork can sit to the outside edge.
