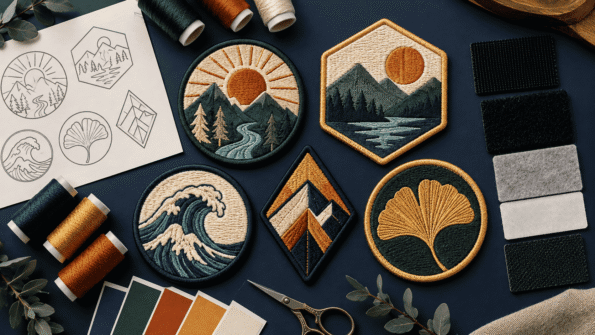
A custom embroidered patch is created by stitching colored thread onto a fabric base according to digitized artwork. The quality and clarity of the finished patch depend on several connected decisions, including design complexity, patch size, thread coverage, border style and backing.
The best embroidered patch designs use clear shapes, readable lettering and enough contrast between the thread and background. Fine lines, gradients and very small details may need to be simplified before stitching.
This custom embroidered patch guide explains how the process works and what to review before placing an order. If you already have artwork, you can also explore custom embroidered patches and request a quote for your project.
What Is a Custom Embroidered Patch?
A custom embroidered patch is a fabric emblem decorated with stitched thread. The design may include a logo, name, symbol, illustration or combination of visual elements.
Unlike a printed image, embroidery creates the design with individual stitches. These stitches give the patch a raised, textured appearance that works well for uniforms, workwear, hats, jackets, clubs, teams and branded merchandise.
An embroidered patch normally has four main parts:
- A fabric base that supports the design
- Thread that forms the visible artwork
- A border that finishes the outer edge
- A backing that controls how the patch attaches to an item
Each part affects the appearance and use of the finished product.
How Custom Embroidered Patches Are Made
The embroidered patch process usually begins with artwork and ends with a finished patch based on an approved proof.
The exact production process can vary by manufacturer, but the main stages generally include artwork review, digitizing, material selection, embroidery, border finishing, backing application and quality inspection.
1. Artwork Review
The artwork is first checked to determine whether it can be reproduced clearly with thread.
The reviewer may consider:
- Patch dimensions
- Letter size
- Line thickness
- Number of colors
- Spacing between elements
- Background complexity
- Border shape
- Small or overlapping details
Artwork that looks clear on a large computer screen may not remain clear when converted into a small physical patch. Minor adjustments may therefore be recommended before digitizing begins.
2. Embroidery Digitizing
Embroidery digitizing converts the design into stitch instructions that embroidery equipment can follow. It is not the same as simply uploading an image or changing its file format.
The digitized file controls factors such as:
- Stitch direction
- Stitch type
- Stitch order
- Thread placement
- Thread density
- Underlay
- Color sequence
- Areas that should remain unstitched
These decisions influence the texture, clarity and stability of the embroidered design.
For example, stitch direction can help separate two neighboring shapes even when they use similar colors. Stitch order determines which elements appear behind or in front of others. Density must also be controlled so that the design has sufficient coverage without placing unnecessary stress on the fabric.
3. Thread and Fabric Selection
Thread colors are selected to reproduce the approved design as closely as the available options allow. The underlying fabric is also chosen based on the design, background color and intended appearance.
When part of the base fabric remains visible, its color becomes an important part of the overall design. A well-chosen fabric color can reduce the amount of embroidery required while still producing a complete-looking patch.
If exact brand colors matter, include the available color references with your artwork. Ask the provider how color matching is handled before approving the proof.
4. Stitching and Finishing
The design is stitched onto the fabric after the embroidery file and colors are approved. The outer edge is then finished using the selected border method.
The chosen backing is added according to the order specifications. The finished patches should then be checked for visible issues such as incorrect colors, loose threads, inconsistent borders or design errors.
What Does Thread Coverage Mean?
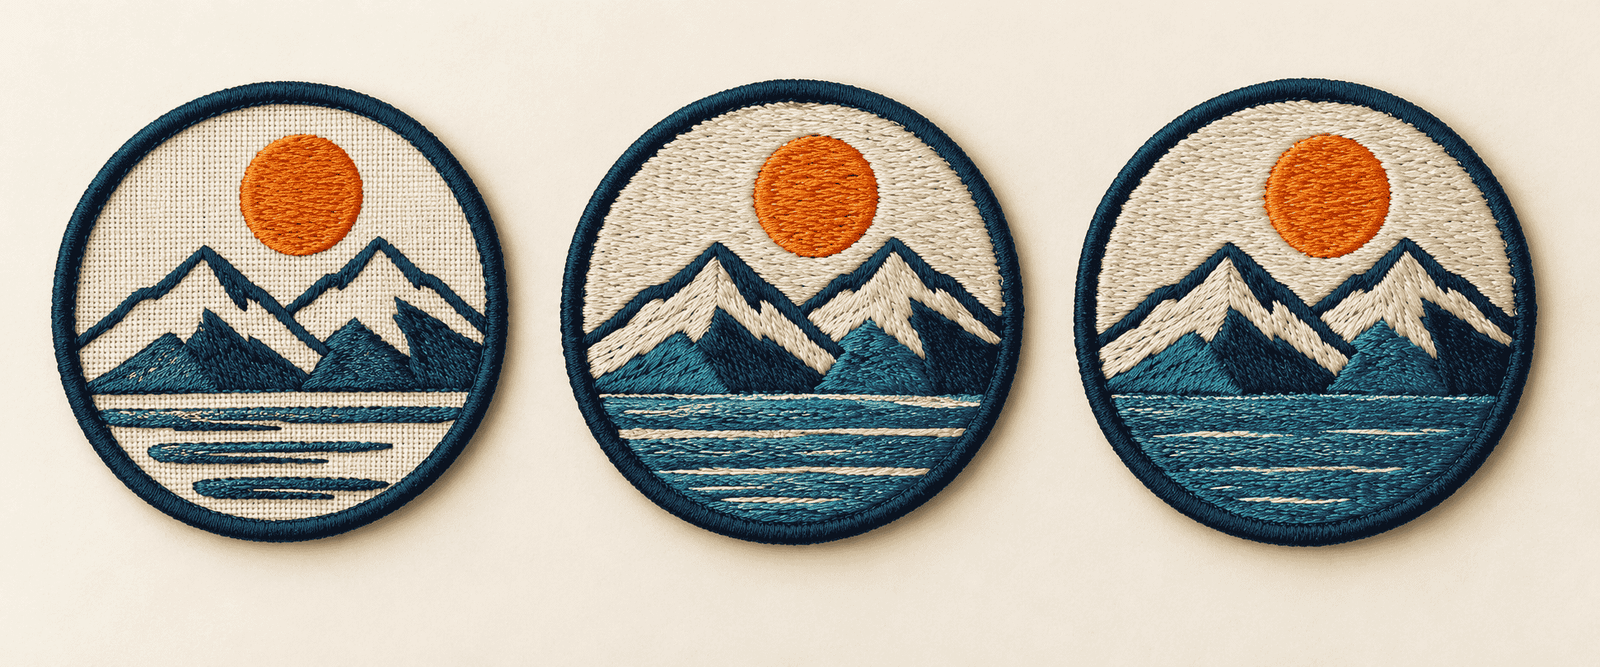
Thread coverage describes how much of the visible patch surface is covered with embroidery. Areas that are not embroidered show the underlying fabric.
Coverage affects the patch’s appearance, texture, design flexibility and potentially its production requirements. A patch with lighter coverage shows more fabric, while a fully embroidered design covers almost the entire visible surface with thread.
Suppliers may use percentage ranges or names such as partial, high or full coverage. Because definitions can vary, confirm how PatchesOrder classifies coverage before publishing exact percentage claims or presenting a coverage option in a quote.
Partial Thread Coverage
Partial coverage uses embroidery only for selected design elements, leaving a noticeable amount of background fabric visible.
It can work well for:
- Simple logos
- Names or initials
- Bold symbols
- Designs with a plain background
- Patches where the base fabric is part of the visual style
For example, a navy fabric background could remain visible while white lettering and a red symbol are embroidered over it.
Partial coverage does not necessarily make a patch look unfinished. When planned properly, the visible fabric becomes an intentional part of the design.
High Thread Coverage
High coverage uses embroidery across most of the patch while leaving some fabric visible.
This approach may suit logos that need a richer embroidered appearance without covering every part of the base. It can also create a useful balance between texture and open space.
Full Thread Coverage
Full coverage uses thread across nearly the entire visible face of the patch. The background and foreground elements are both formed through embroidery.
This creates a heavily stitched, textured finish. It may be appropriate when the complete surface needs to appear embroidered or when the background contains stitched patterns, shapes or multiple colors.
Full coverage is not automatically the best choice for every design. A simpler patch with visible fabric can sometimes provide better contrast and cleaner detail.
How to Choose the Right Thread Coverage
Choose coverage according to the artwork rather than assuming that more embroidery always produces a better patch.
Consider these questions:
- Does the background need to be embroidered?
- Can the base fabric provide the required background color?
- Is texture important across the entire patch?
- Does the design contain large solid-color areas?
- Which elements need to stand out visually?
- Will visible fabric improve or weaken the design?
A logo containing only a business name and a simple icon may work well with partial coverage. A detailed emblem with a colored background may need higher or full coverage.
Ask to see how the proposed coverage appears in the proof. Also confirm the available coverage options and their effect on the quote.
Design Artwork That Works With Embroidery
Embroidery has a distinctive texture, but it cannot reproduce every digital effect exactly. Designing for the medium helps produce a clearer patch.
Simplify Fine Details
Small decorative elements can merge when converted into stitches. Remove details that do not contribute to the main meaning of the design.
Focus on the elements people need to recognize first, such as:
- Brand name
- Initials
- Main icon
- Team symbol
- Organization name
- Central illustration
A simplified mountain outline, for instance, may stitch more clearly than a landscape containing many trees, shadows and thin contour lines.
Make Text Easy to Read
Text must be large and open enough for individual letters to remain distinct.
When preparing embroidered lettering:
- Use a clean, readable font.
- Avoid extremely thin letter strokes.
- Leave space between individual letters.
- Limit long phrases on small patches.
- Avoid placing text over a complex background.
- Use strong contrast between lettering and surrounding colors.
If all the requested wording cannot fit clearly, consider increasing the patch size, shortening the text or moving secondary information elsewhere.
Replace Gradients With Solid Colors
Embroidery is generally better suited to solid areas of color than smooth digital gradients. A gradient may need to be converted into separate color sections or represented through stitch direction and thread selection.
The exact result depends on the artwork and production method. Review the proposed interpretation during proofing instead of assuming it will match a screen-based effect exactly.
Strengthen Thin Lines
Very fine outlines may disappear, break or become unclear during stitching. Important lines may need to be thickened.
This commonly applies to:
- Small illustration details
- Thin font styles
- Detailed outlines
- Closely spaced patterns
- Fine lines inside a logo
The required thickness depends on the design size and embroidery setup, so request artwork guidance rather than relying on a universal measurement.
Use Clear Color Contrast
Contrast helps separate letters, symbols and background areas.
Light thread usually stands out well against a dark background, while dark thread can provide clarity on a light base. Similar shades placed beside each other may blend visually unless an outline or stitch-direction change separates them.
View the colors as a complete system rather than selecting each one independently.
Choose an Appropriate Patch Size
Patch size determines how much room is available for text, shapes and stitched detail.
A small patch can work well for a simple icon or short name. A design containing multiple words, detailed artwork or several sections may require a larger size.
Before choosing dimensions:
- Measure the available placement area.
- Identify the smallest important detail in the artwork.
- Check whether the text remains readable at the proposed size.
- Consider the shape and proportions of the design.
- Ask whether any elements need to be simplified.
Do not select size based only on the number of design elements. The relationship between width, height, lettering and detail is more important.
A wide name patch, for example, may need different dimensions from a circular logo even if both contain the same amount of text.
Select the Right Border
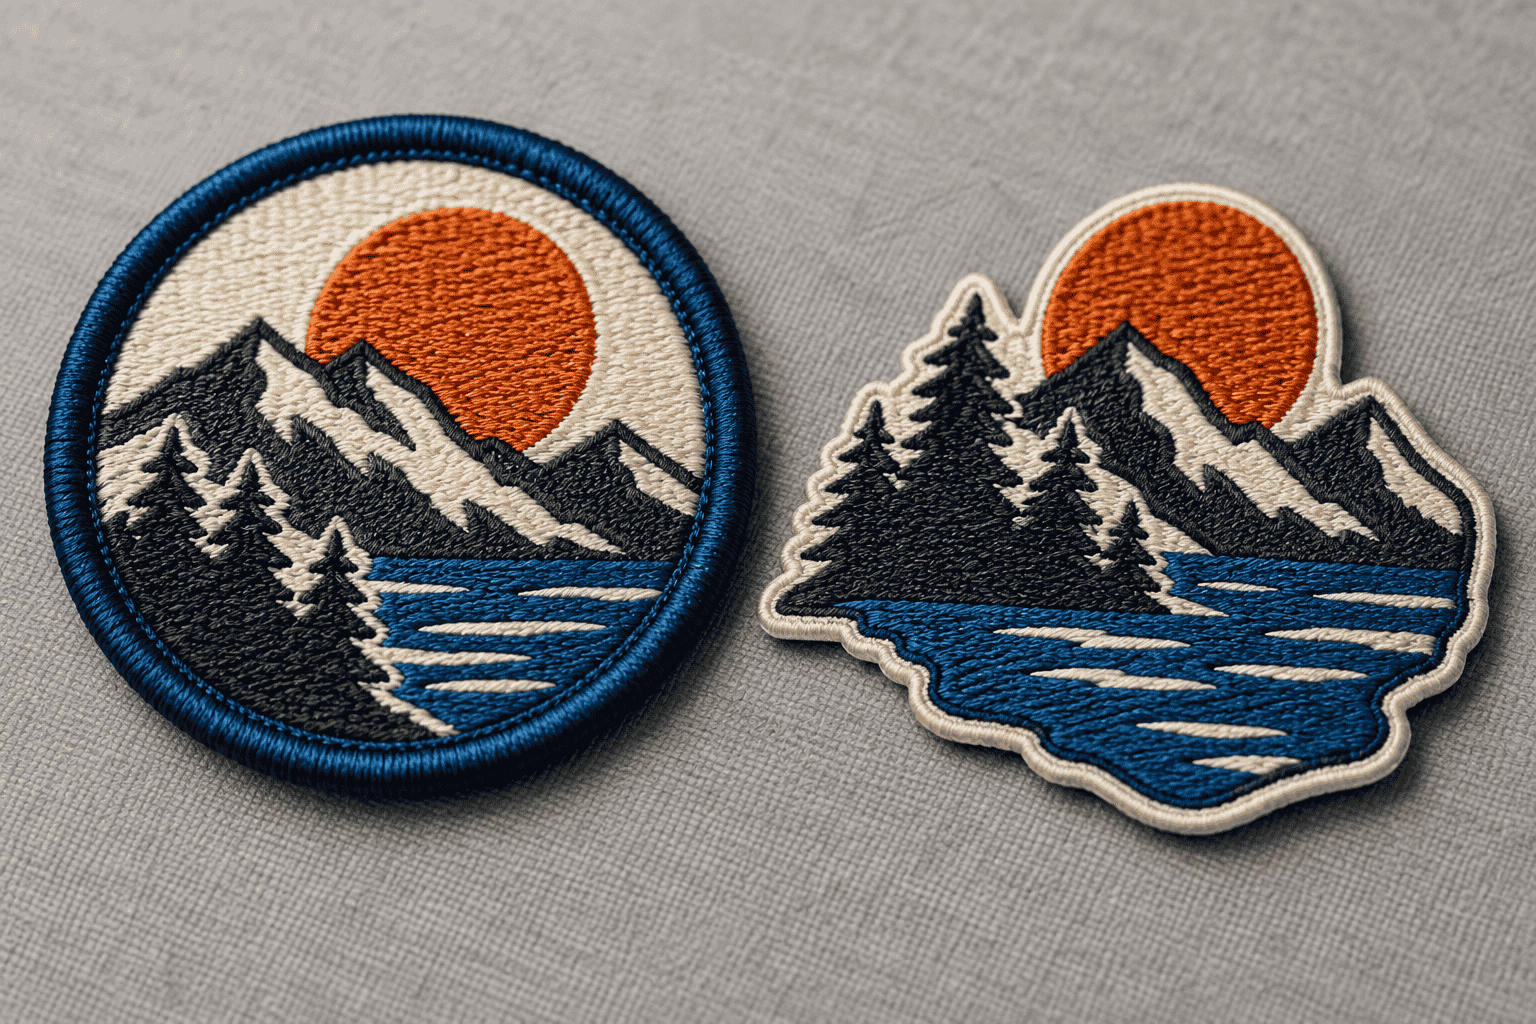
The border finishes the edge of an embroidered patch and helps define its shape.
The two commonly discussed options are merrowed borders and heat-cut or laser-cut edges. Available terminology and production methods should be confirmed with PatchesOrder.
Merrowed Border
A merrowed border is a raised, stitched edge commonly associated with traditional embroidered patches.
It is generally suited to simple shapes with smooth outlines, including:
- Circles
- Squares
- Rectangles
- Ovals
- Simple shields
The raised edge can give the patch a substantial, classic finish. However, it may not follow sharp corners or complicated outlines as precisely as a cut edge.
Heat-Cut or Laser-Cut Edge
A cut edge follows the shape of the patch more closely and can be suitable for complex or irregular outlines.
It may be useful for:
- Custom silhouettes
- Detailed outer shapes
- Sharp corners
- Designs with inward curves
- Patches intended to have a flatter edge
The best option depends on the design, patch shape and available production process.
| Border option | Commonly suited to | Visual effect |
|---|---|---|
| Merrowed border | Circles, ovals, rectangles and simple shapes | Raised, traditional stitched edge |
| Cut edge | Detailed, irregular or custom shapes | Flatter edge that follows the artwork closely |
Confirm the border options offered for your chosen design before placing the order.
Compare Embroidered Patch Backings
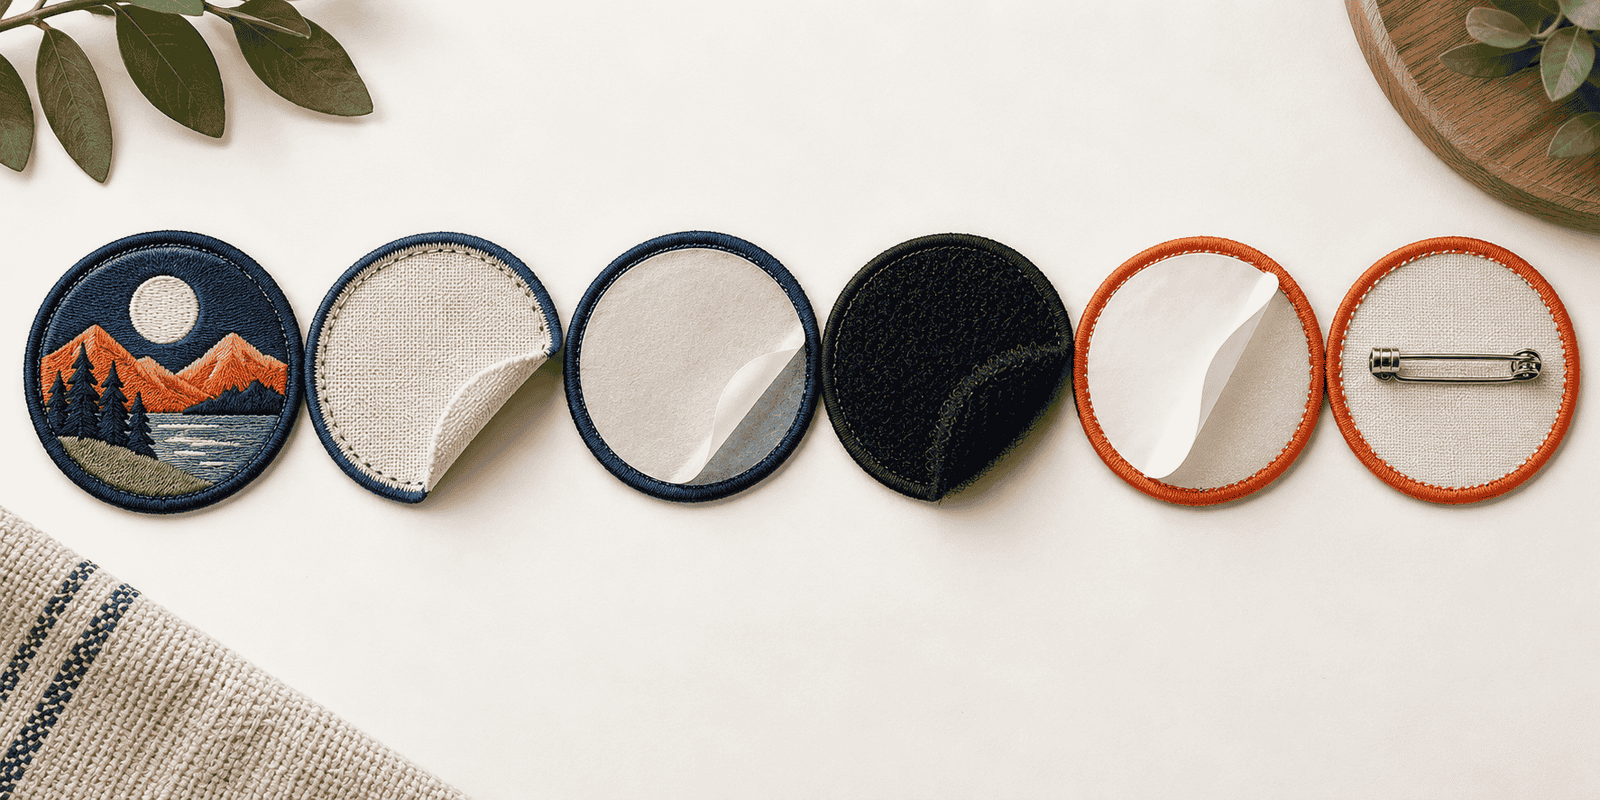
The backing determines how the patch is attached to clothing, accessories or equipment. Choose it according to the surface, expected use and whether the patch needs to be removable.
| Backing option | Appropriate when | Important consideration |
|---|---|---|
| Sew-on | You want a secure attachment to compatible fabric | Requires stitching around or through the patch |
| Iron-on | You want heat-assisted application on a compatible material | Not every fabric can safely accept heat |
| Hook-and-loop | The patch needs to be removed, replaced or repositioned | The receiving surface needs the matching component |
| Adhesive | The patch is intended for temporary or presentation use | Suitability depends on the surface and intended duration |
| No backing | The patch will be sewn on or used in another production process | Attachment must be handled separately |
| Pin backing | The patch needs to attach without permanent sewing | Hardware position and intended fabric should be considered |
The exact backing materials and options available from PatchesOrder require confirmation before publication.
Sew-On Backing
Sew-on patches are attached using stitches around the edge or through suitable areas of the patch. This method is often selected when a secure, long-term attachment is required.
It can be practical for uniforms, jackets, bags and workwear. The result depends on the garment material and quality of application.
Iron-On Backing
Iron-on patches use a heat-activated layer. Application normally involves controlled heat and pressure.
Not every garment is suitable for an iron-on patch. Delicate, coated, heat-sensitive or textured fabrics may require a different attachment method.
Ask for application instructions and test the material when appropriate.
Hook-and-Loop Backing
Hook-and-loop backing is useful when patches need to be changed or removed. It is commonly considered for uniforms, gear, bags and interchangeable identification.
Make sure the item already has, or can accept, the matching loop surface.
Adhesive Backing
Adhesive backing may be helpful for temporary placement, displays or certain short-term uses. It should not automatically be treated as a permanent alternative to sewing.
Surface texture, movement, moisture and repeated handling can affect adhesion. Confirm whether it is appropriate for the intended application.
How to Review an Embroidered Patch Proof
The proof represents how your artwork is expected to translate into an embroidered patch. Review it carefully before approval.
Check the following:
- All words are spelled correctly.
- The correct logo version is being used.
- The patch dimensions and proportions are accurate.
- The shape matches your request.
- Thread and background colors are correctly assigned.
- The border style is correct.
- The selected backing is listed correctly.
- Small text appears readable.
- Important lines are thick enough to remain visible.
- Elements are placed in the correct order.
- The expected thread coverage is clear.
- Requested revisions have been completed.
Ask questions when a production term, color or design adjustment is unclear. Approval should only be given when the proof and order details match your requirements.
If physical samples, stitch-outs or revised proofs are available, confirm the relevant process and any associated conditions directly with PatchesOrder.
When Another Patch Type May Be Better
Embroidery provides a classic stitched appearance, but it is not the best production method for every design.
| Design requirement | Patch type to consider | Reason |
|---|---|---|
| Very small details or fine lettering | Woven patch | Finer threads and a flatter surface may preserve more detail |
| Photographic artwork or complex gradients | Printed patch | Printing can reproduce visual transitions and intricate imagery |
| Flexible, weather-oriented dimensional design | PVC patch | PVC can create bold raised and recessed elements |
| Large varsity-style letters | Chenille patch | Chenille provides a soft, textured collegiate appearance |
| Minimal premium branding | Leather patch | Leather can suit simple engraved, embossed or debossed designs |
Choose embroidered patches when stitched texture is part of the desired look and the artwork can be adapted to the limits of thread.
Consider another patch type when preserving tiny details, smooth gradients, photographic effects or a specific material finish matters more than traditional embroidery.
Information to Include in Your Quote Request
A detailed request helps the patch provider understand the project and identify any artwork issues early.
Provide the following information when available:
- Artwork or reference image
- Intended patch dimensions
- Required quantity
- Preferred patch shape
- Thread and background colors
- Expected thread coverage
- Border preference
- Backing choice
- Intended placement
- Fabric or item receiving the patch
- Required delivery date, if applicable
- Any important design or packaging instructions
If you are uncertain about coverage, borders or backing, explain how the patch will be used and request a recommendation.
Frequently Asked Questions
What makes a design suitable for an embroidered patch?
A suitable design usually has clear shapes, readable lettering, practical line thickness and strong color contrast. Complicated artwork may need to be simplified before it can be stitched clearly.
What is embroidery digitizing?
Embroidery digitizing converts artwork into stitch instructions. The resulting file controls stitch type, direction, order, density and thread placement during production.
Is full thread coverage always better?
No. Full coverage creates a heavily embroidered surface, but partial coverage may provide a cleaner result when the fabric background supports the design. The best choice depends on the artwork and desired appearance.
Can embroidered patches include small text?
They can include small text, but readability depends on the font, letter spacing, patch dimensions and stitch setup. Very small or thin lettering may need to be enlarged or simplified.
Which border is best for a custom-shaped patch?
A heat-cut or laser-cut edge is often considered for detailed custom shapes because it can follow irregular outlines more closely. Confirm the available edge method for your design with the provider.
Which backing should I choose for a uniform?
The best backing depends on whether the patch should be permanent or removable and whether the uniform fabric can accept heat. Sew-on may suit a secure attachment, while hook-and-loop can work for replaceable patches.
What should I submit if I do not have vector artwork?
Submit the clearest file you have, such as a high-resolution PNG, JPG or PDF. You can also provide a sketch with written notes about the required text, colors, dimensions and intended use.
Start Your Custom Embroidered Patch Project
A successful embroidered patch starts with artwork designed for thread. Keep important shapes clear, make the lettering readable and select coverage according to the design instead of automatically choosing the highest amount.
The patch size, border and backing should also match where and how the patch will be used. Before production, review the proof carefully and confirm every specification.
Ready to turn your artwork into a stitched patch? Request a free quote for custom embroidered patches and share your design, dimensions, quantity, backing preference and intended use.
